Yard Crashers Episode 2
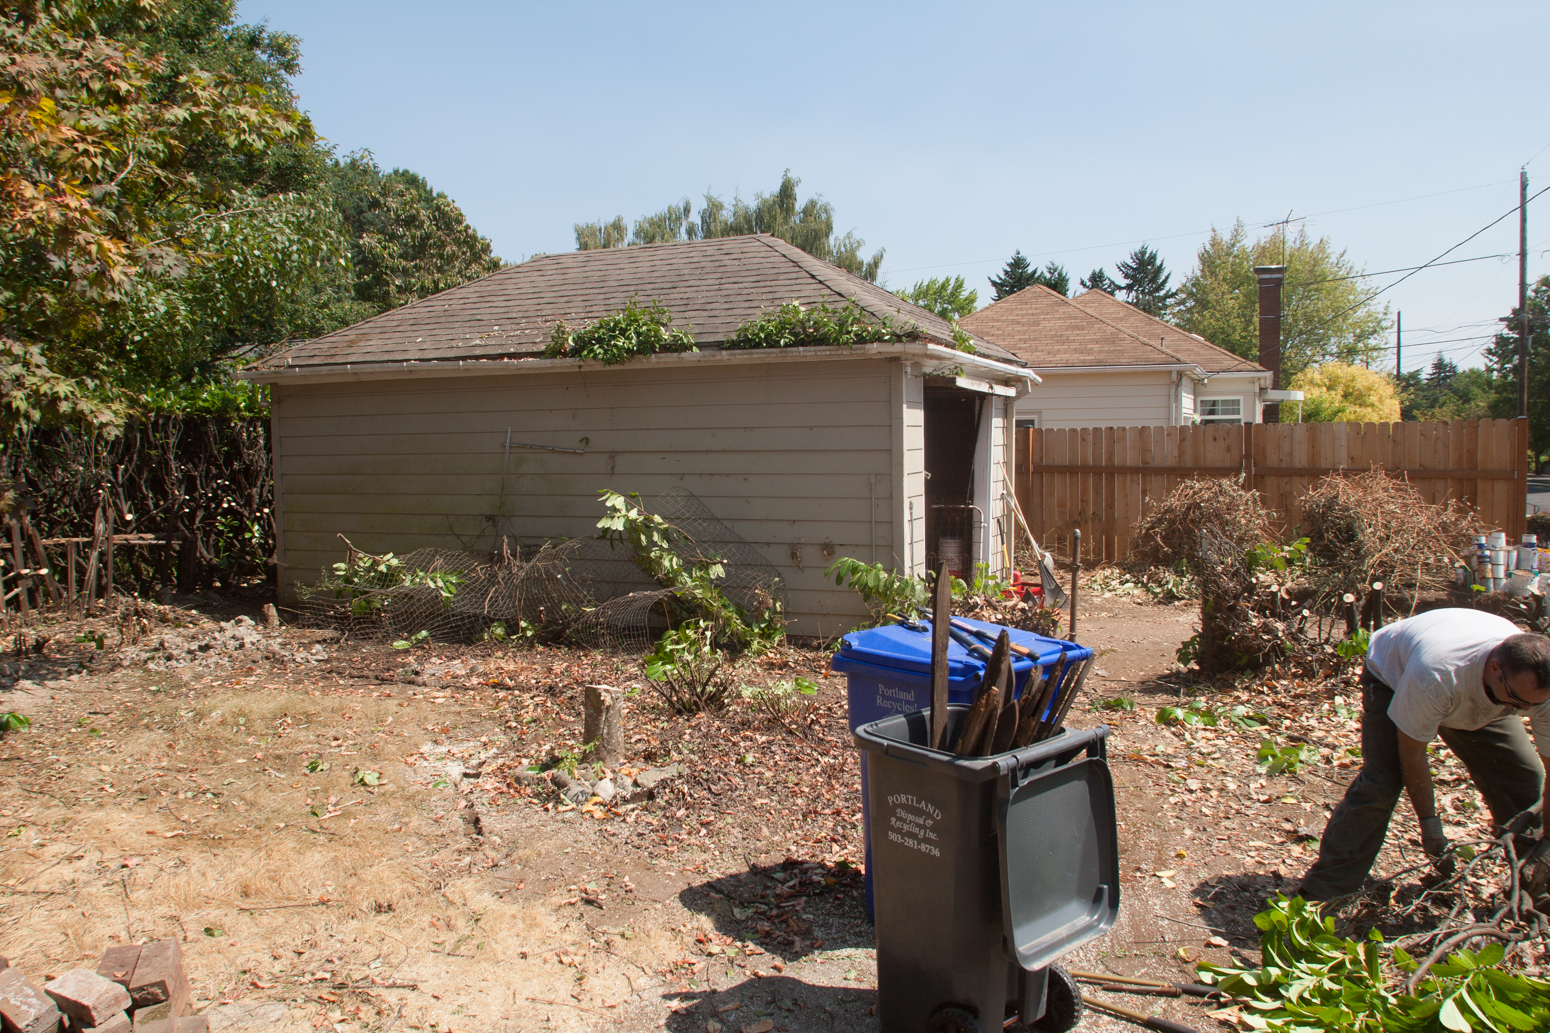
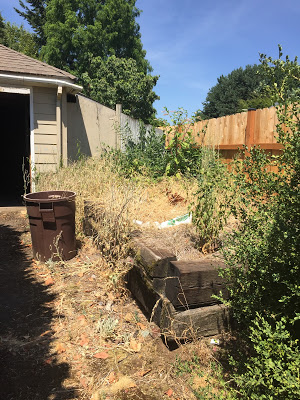
When last we left you poor, sad Adam was grilling dinner in our post-apocolyptic back yard. Wah-wah.

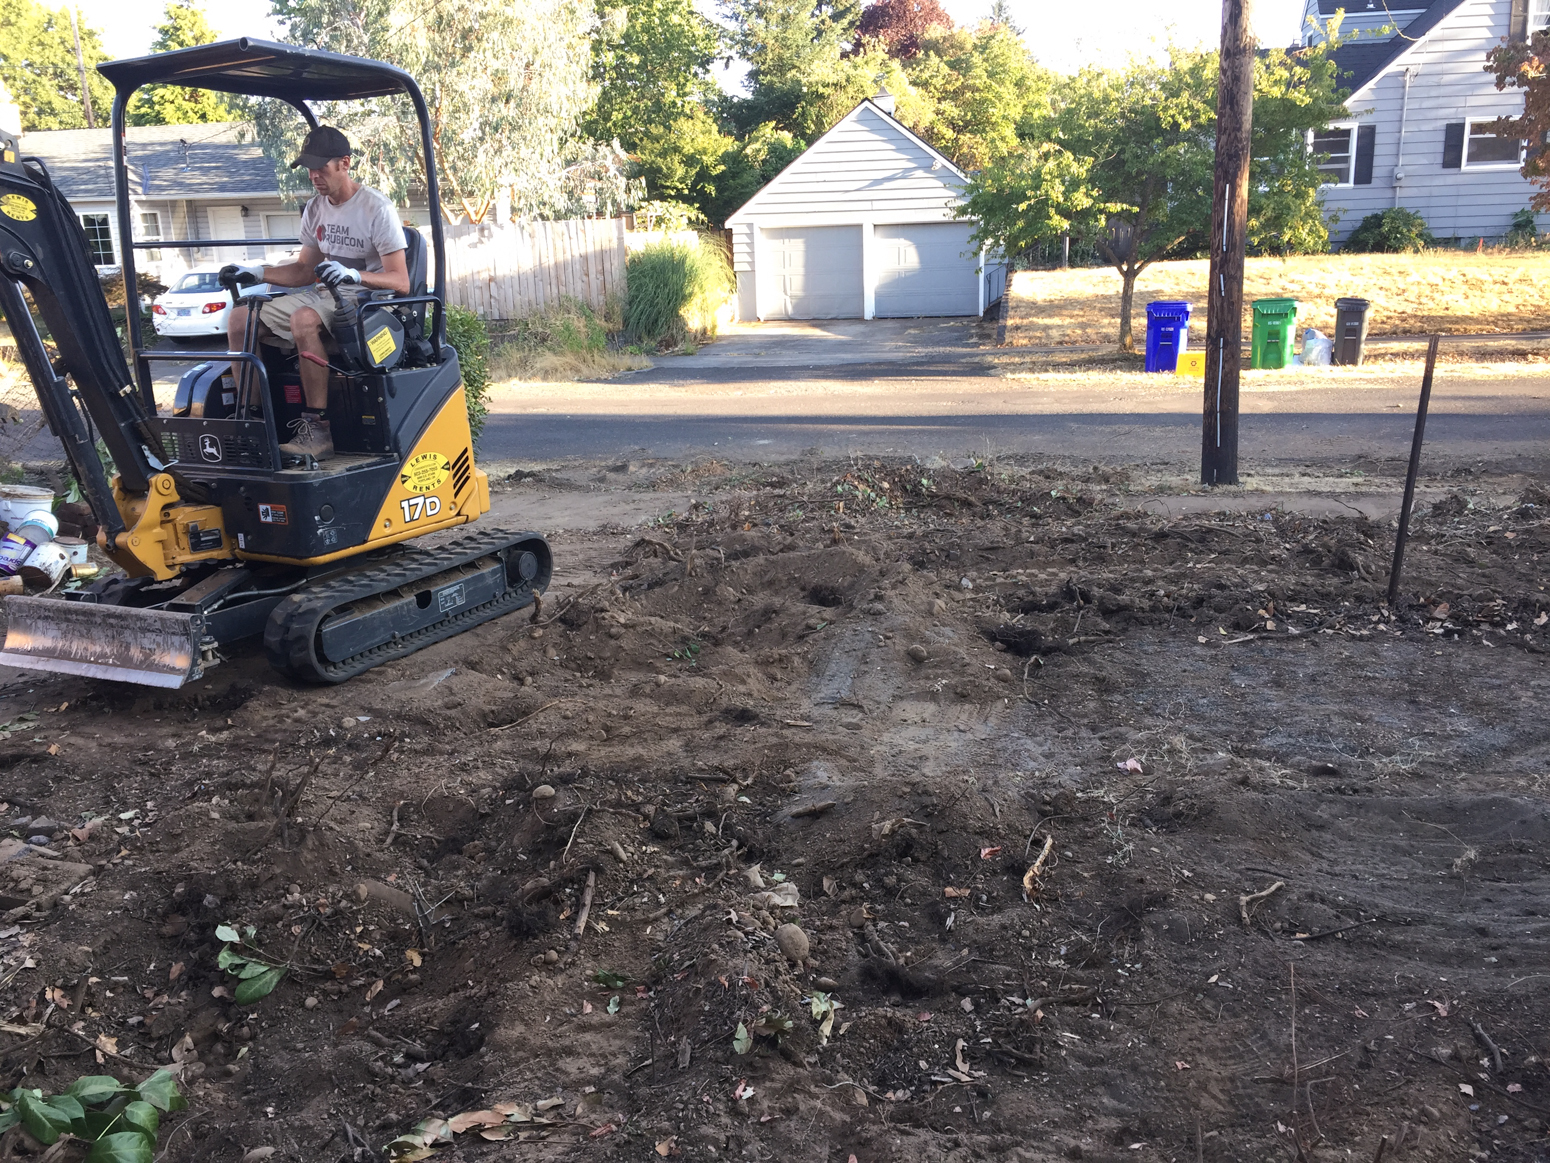
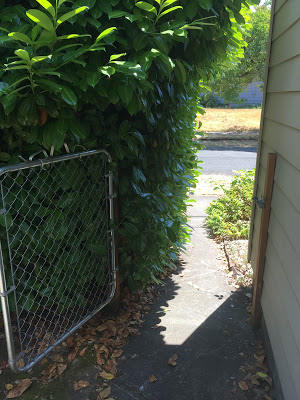
From there we began the hunt for a concrete team to construct a retaining wall where the laurel hedge had been - along the southern edge of our yard against the sidewalk and up the eastern side along the garage - which would allow us to level out the yard and maximize our use of the space.

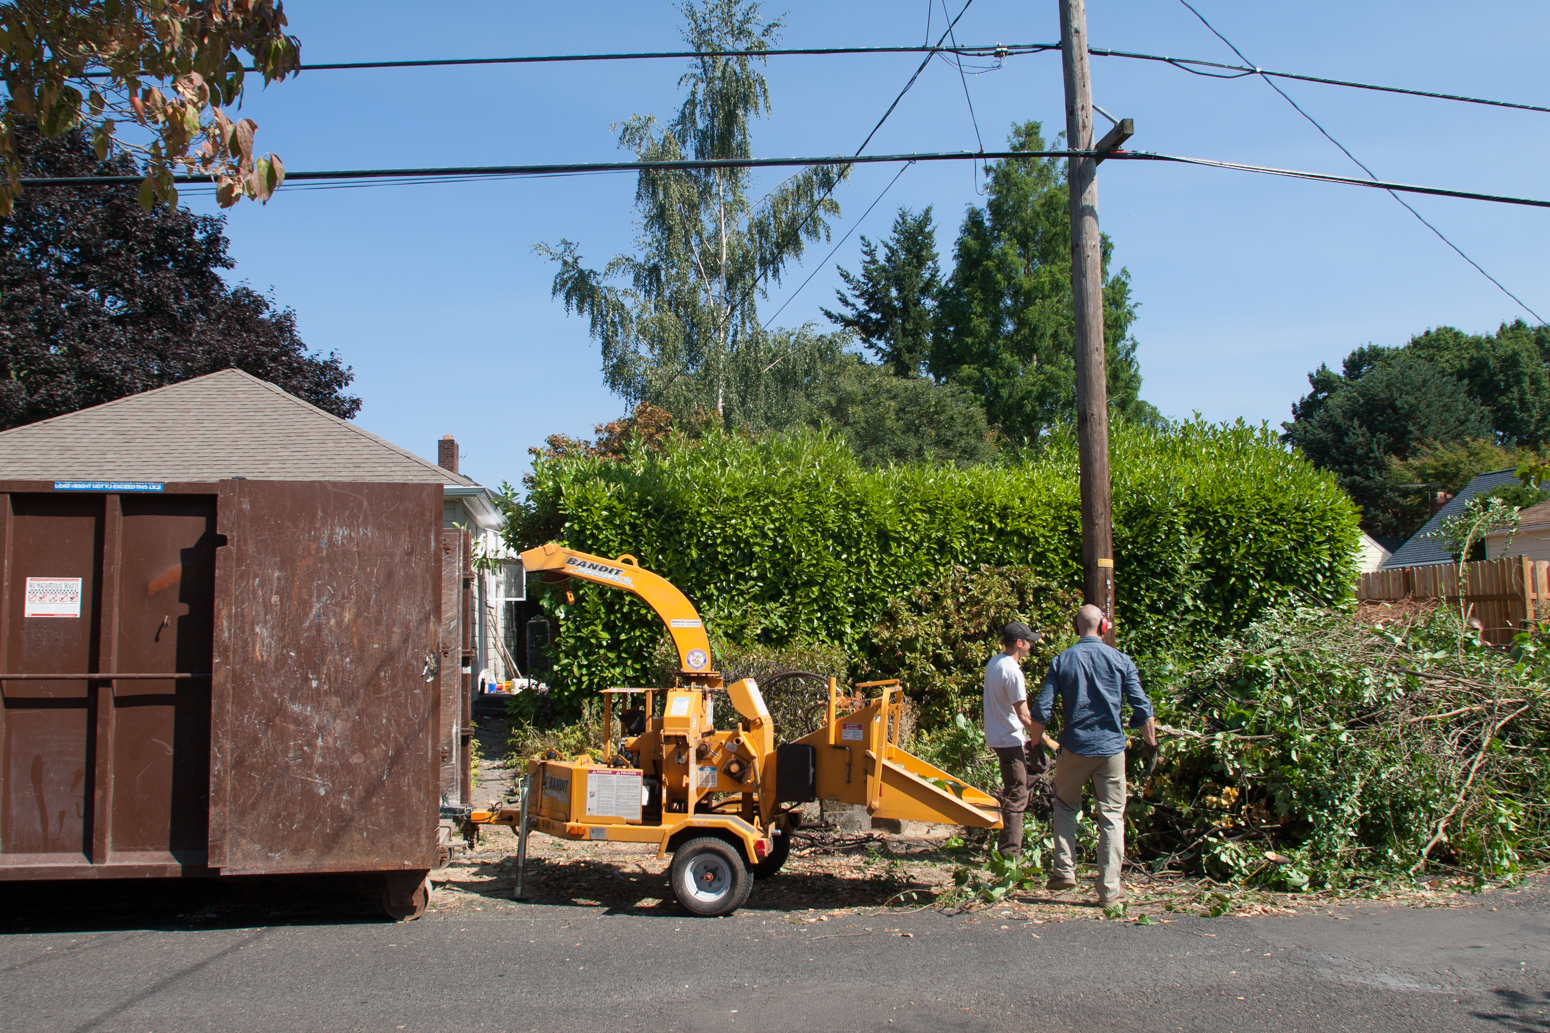
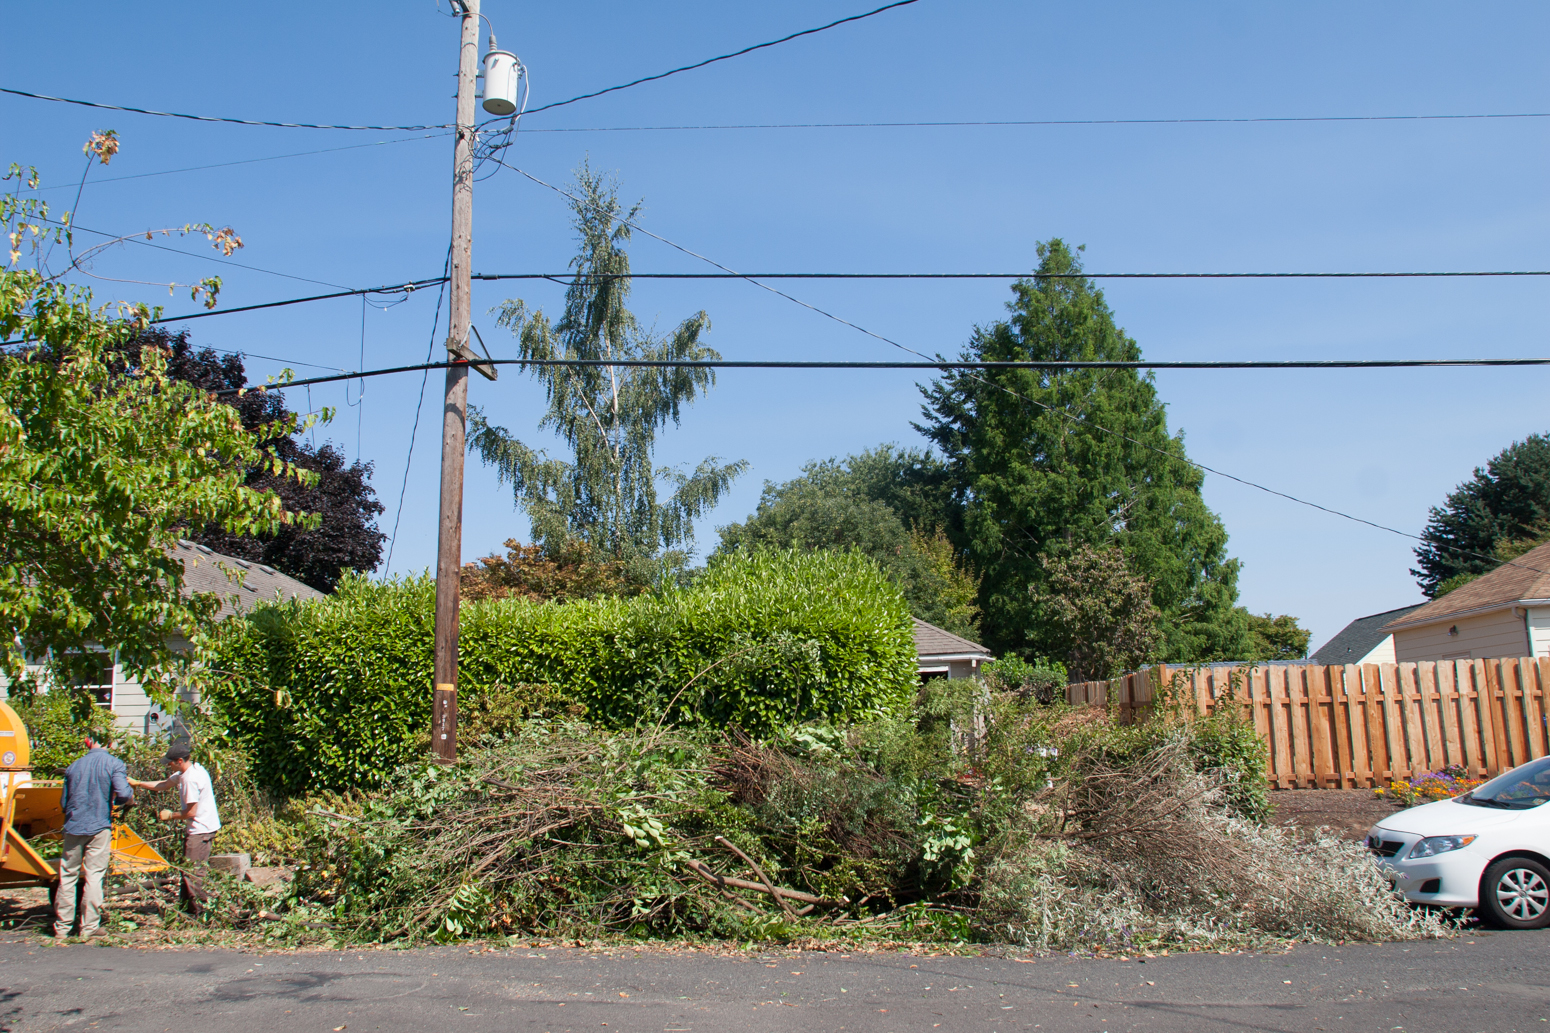
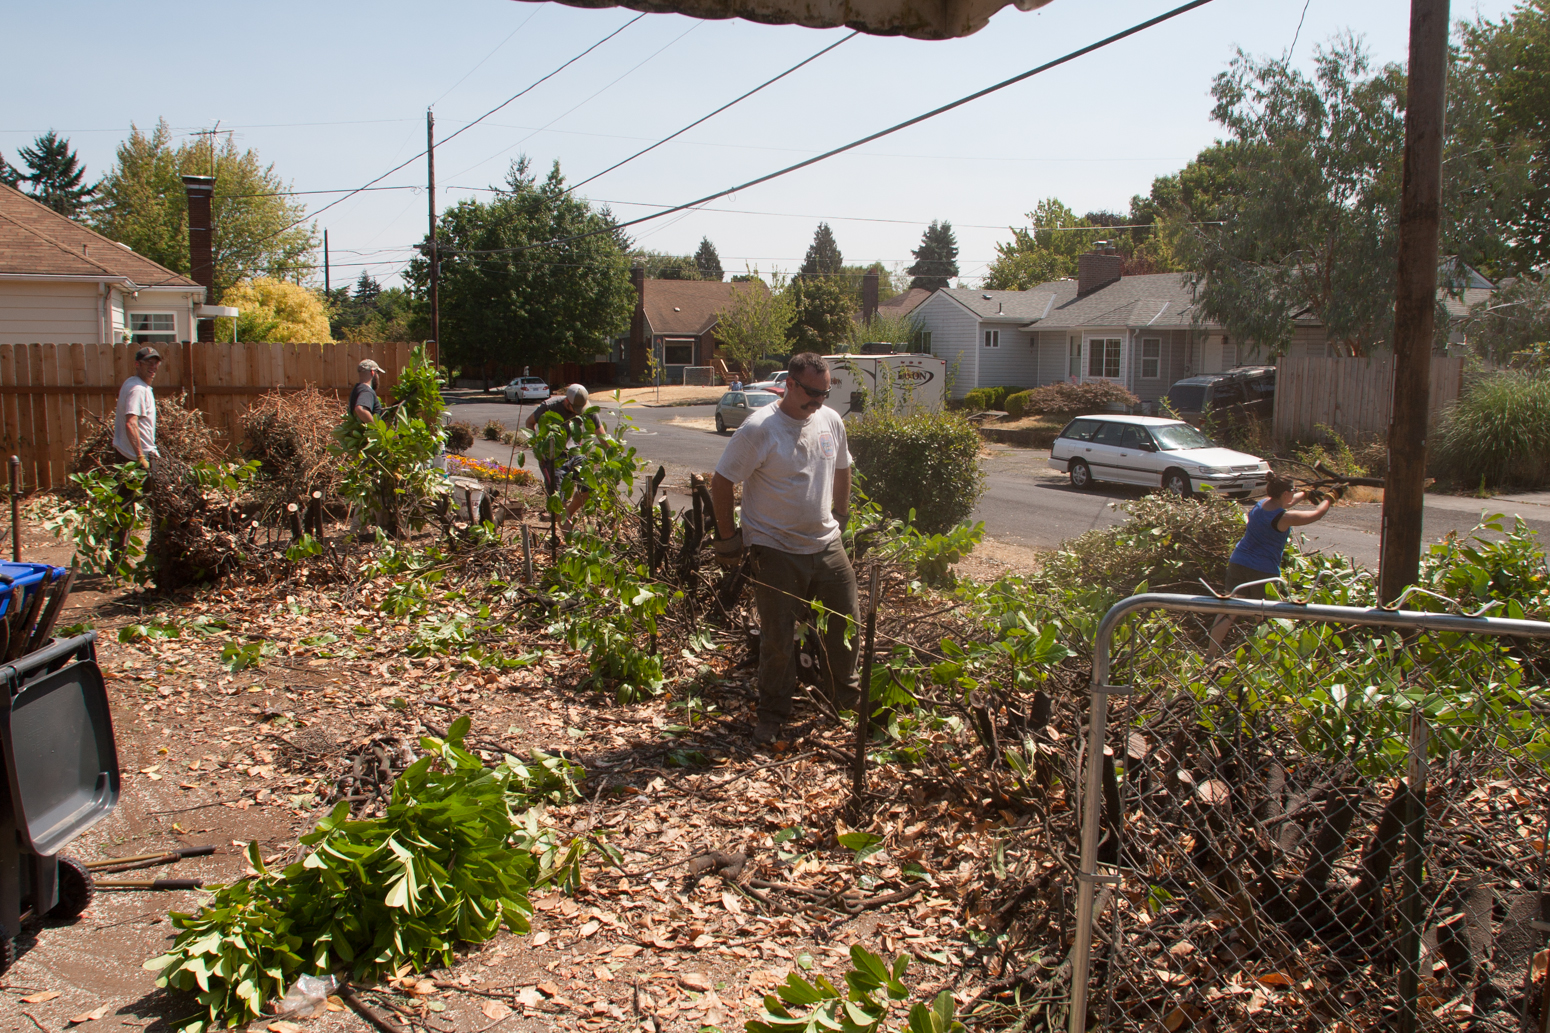
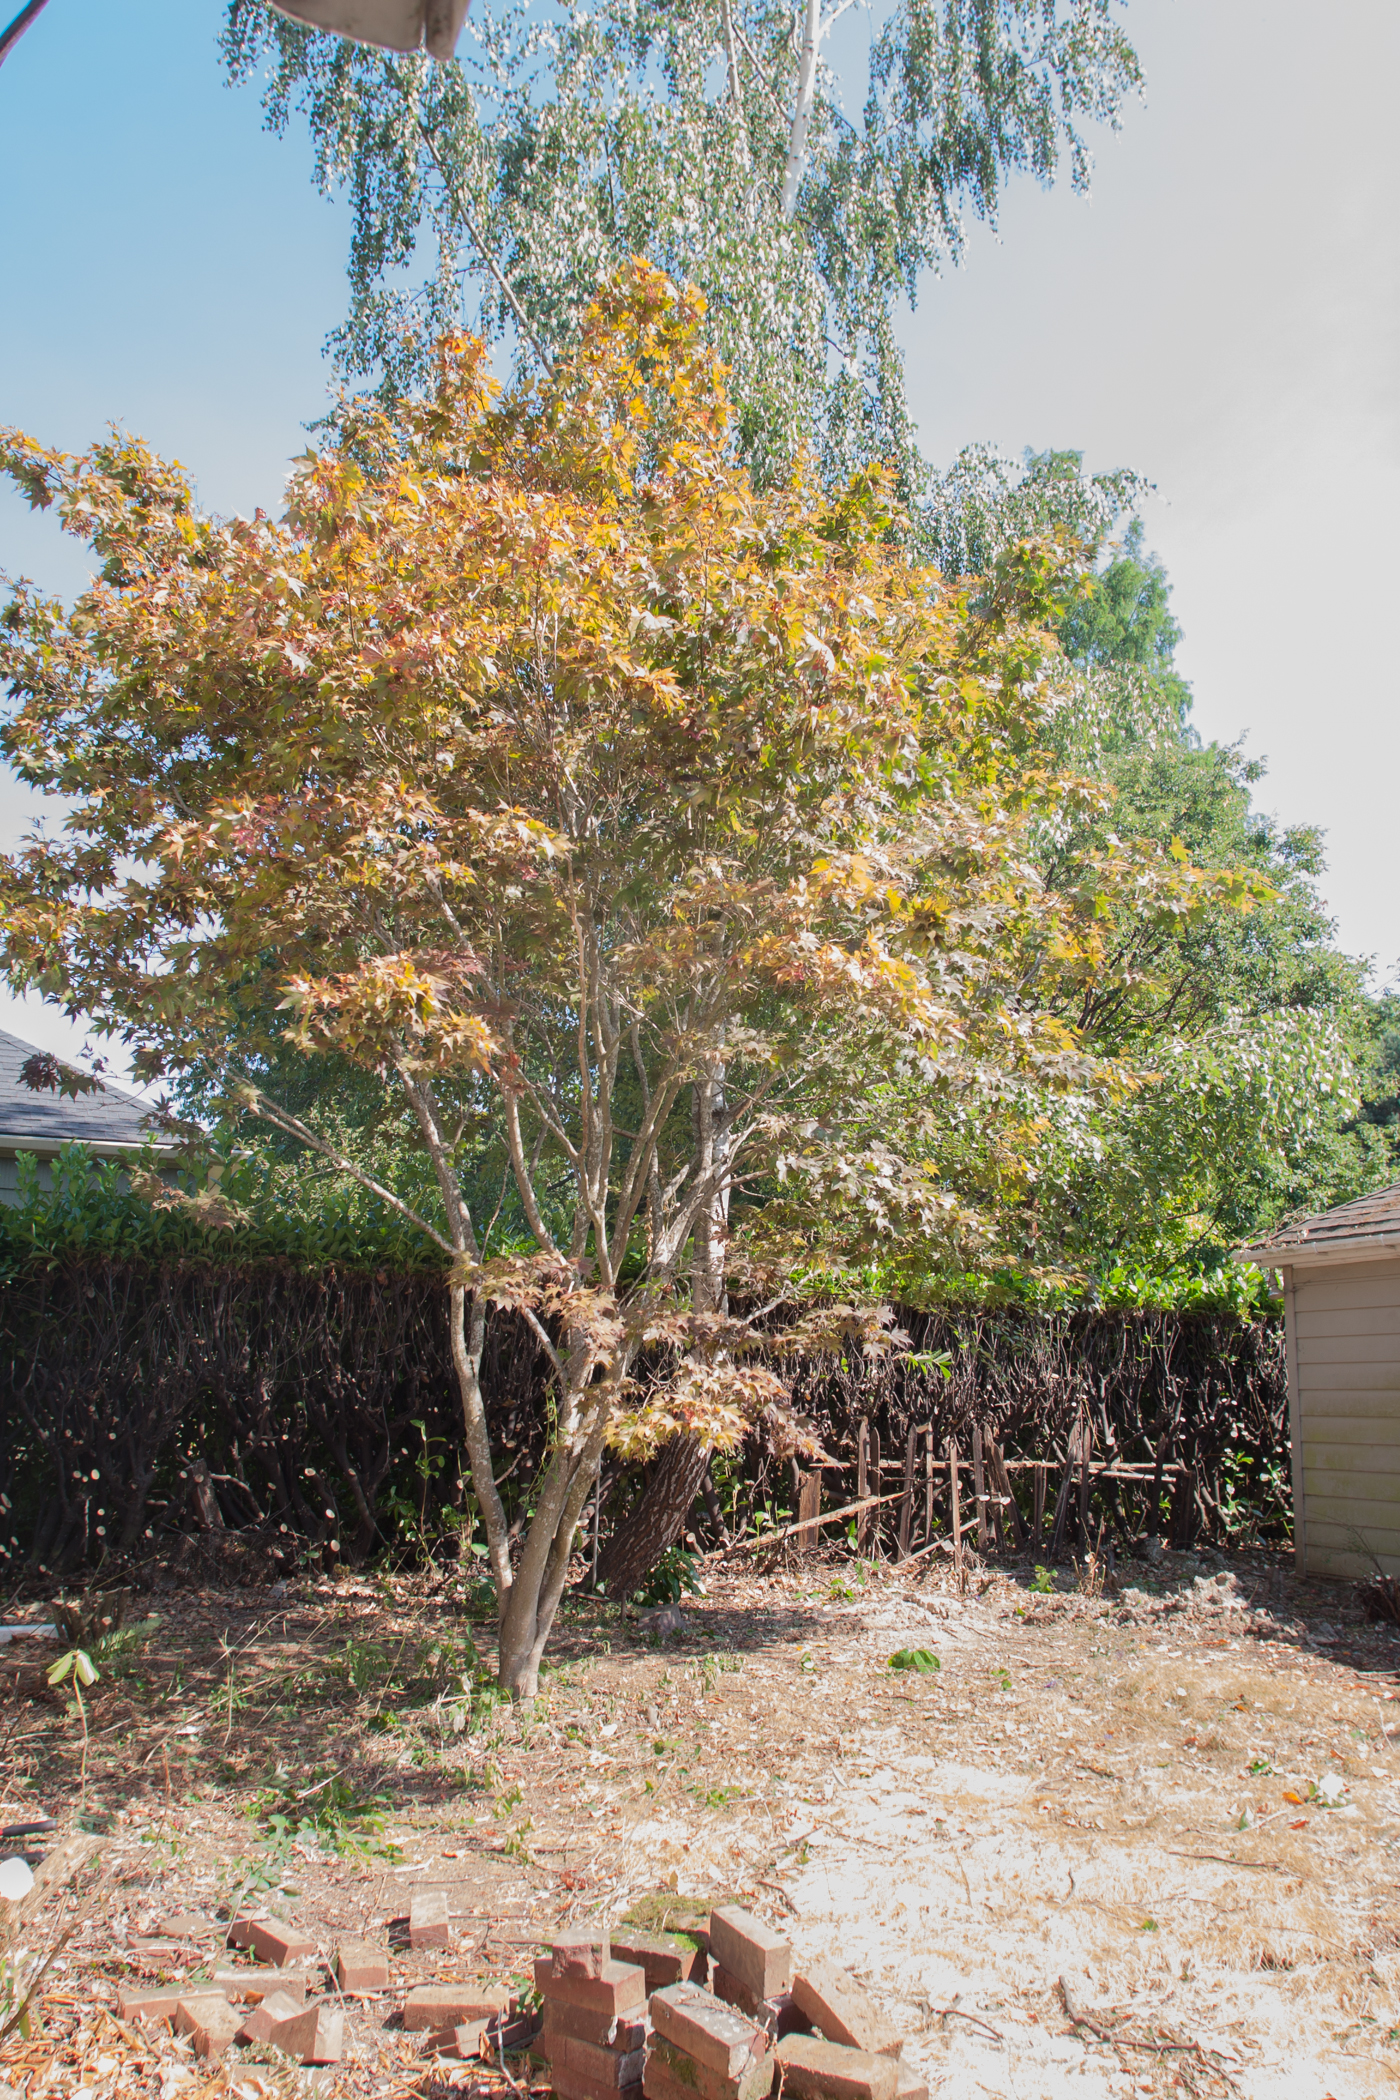
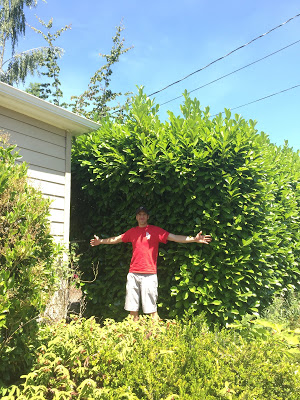
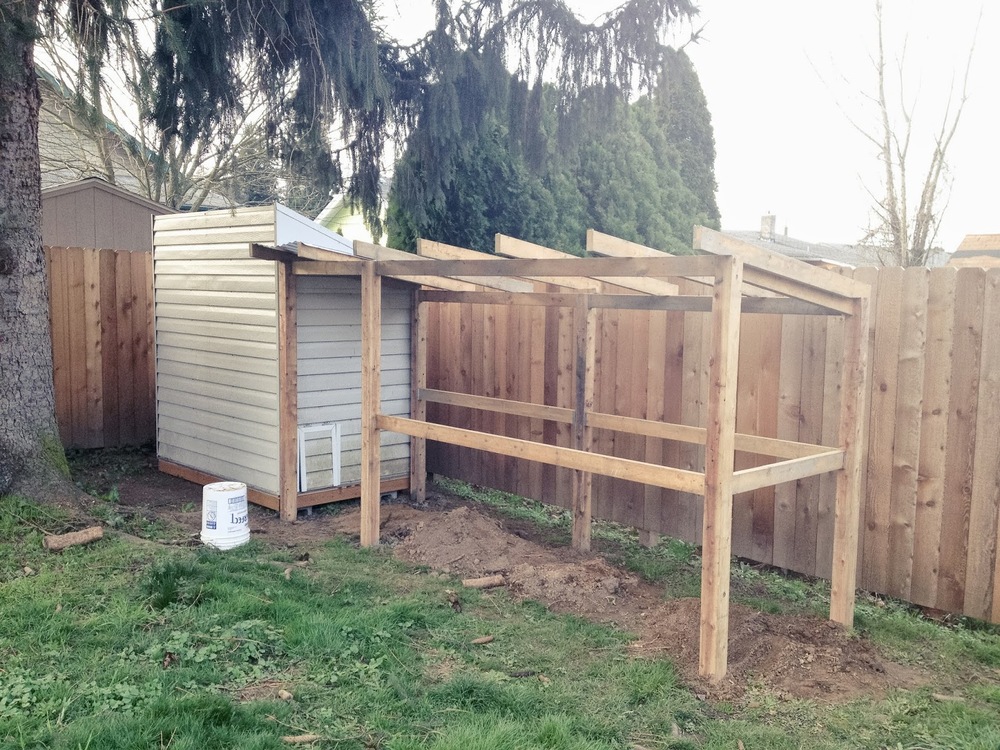
While the retaining wall was being poured we set about constructing the fence on the opposite side of the yard. Our neighbor has a crush on his laurels so we we just trimmed them back to the property line and built our fence up against them. Frankly I like the extra greenery above the cedar. 

20150919_Yard_Phase_2_012.jpg

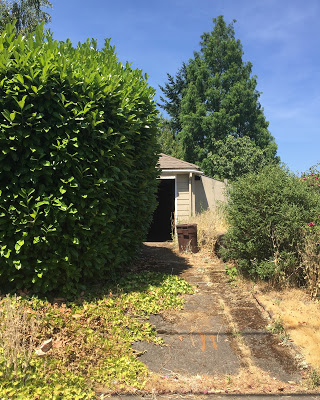
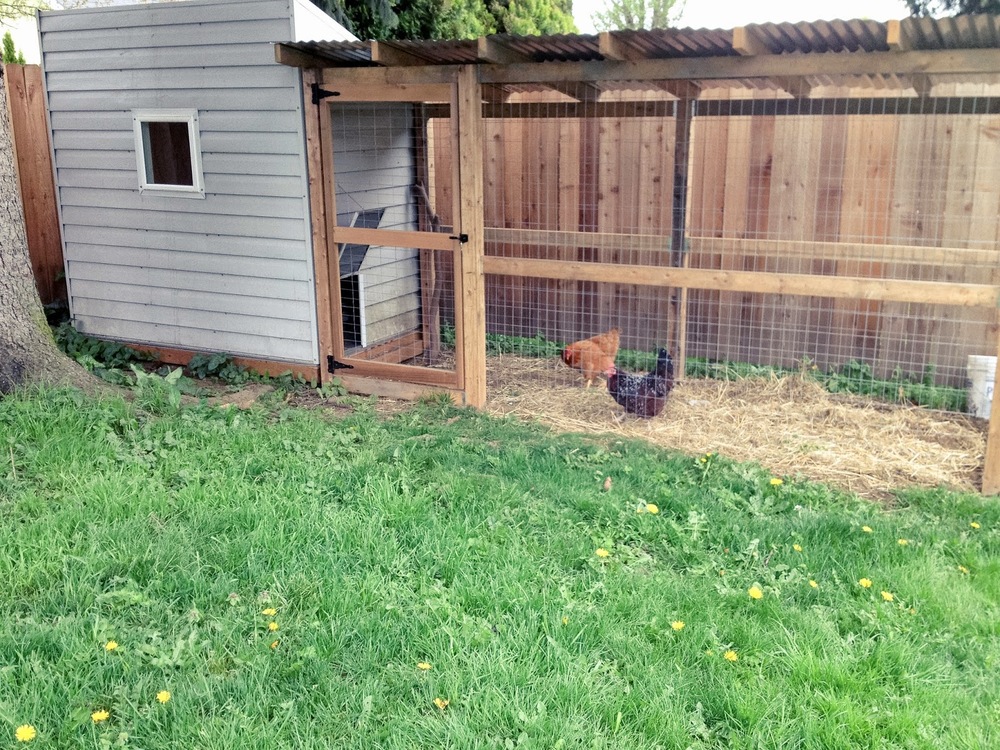
The fence runs from the back corner of the house, behind the garage, to the edge of our lot. The plan is to eventually build a legit lean-to against the far side of the garage to house yard tools, my potting bench and supplies, and various other "yard related items." This lean-to will be accessible from both ends to allow us to take bikes out the front and the lawn mower out the back. Until then it's currently serving as extra chicken run space. #yardgoals.

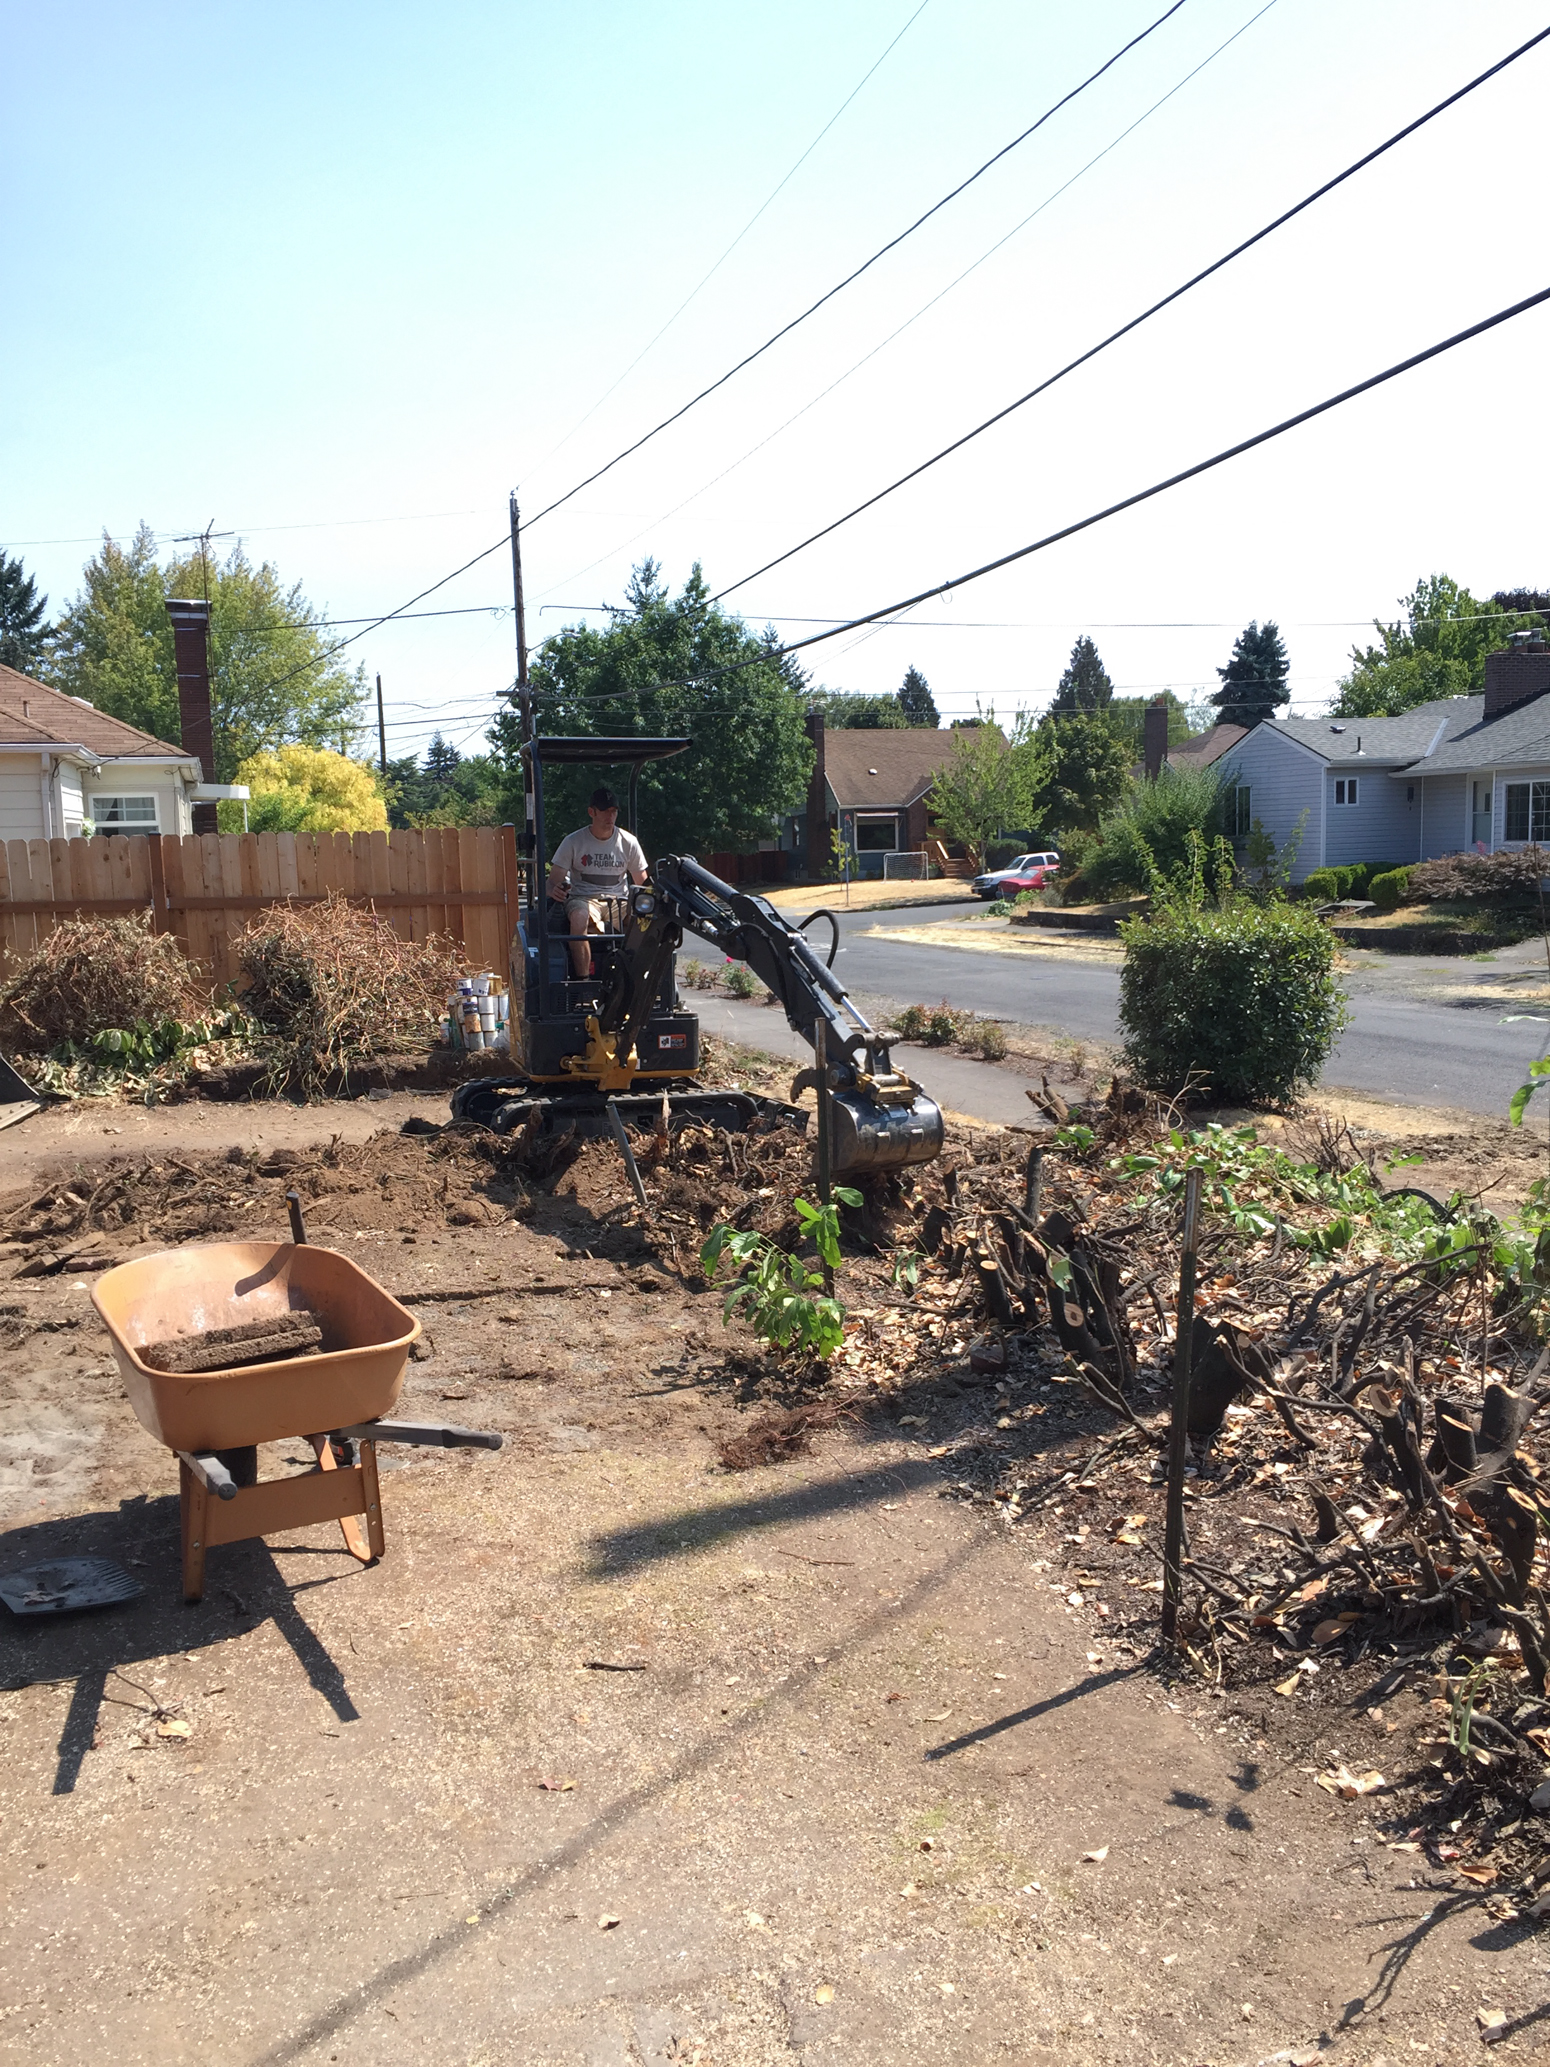
While we were building the fence the retaining wall was setting - and just like that - SO. MUCH. MORE. YARD!

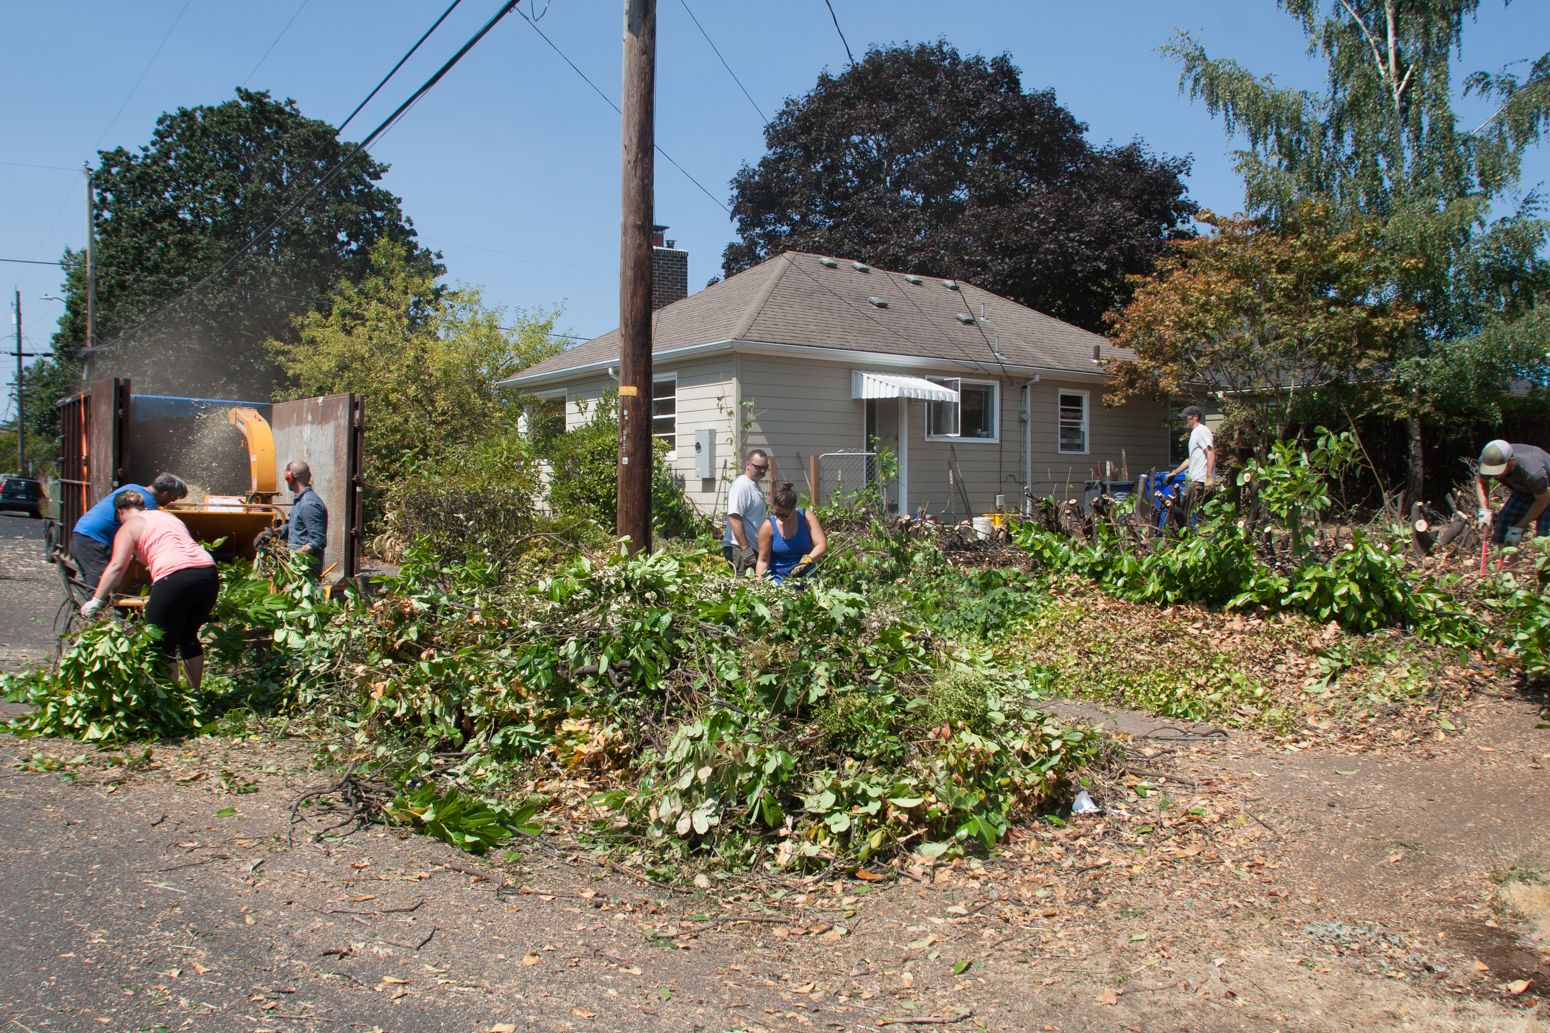
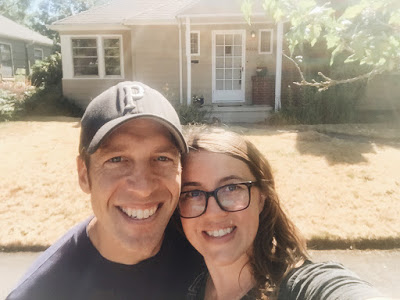
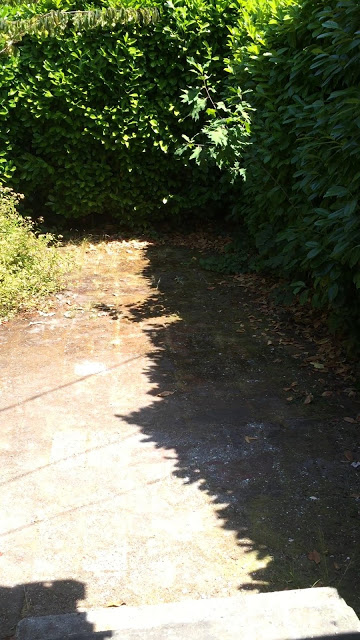
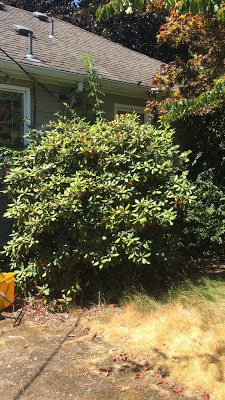
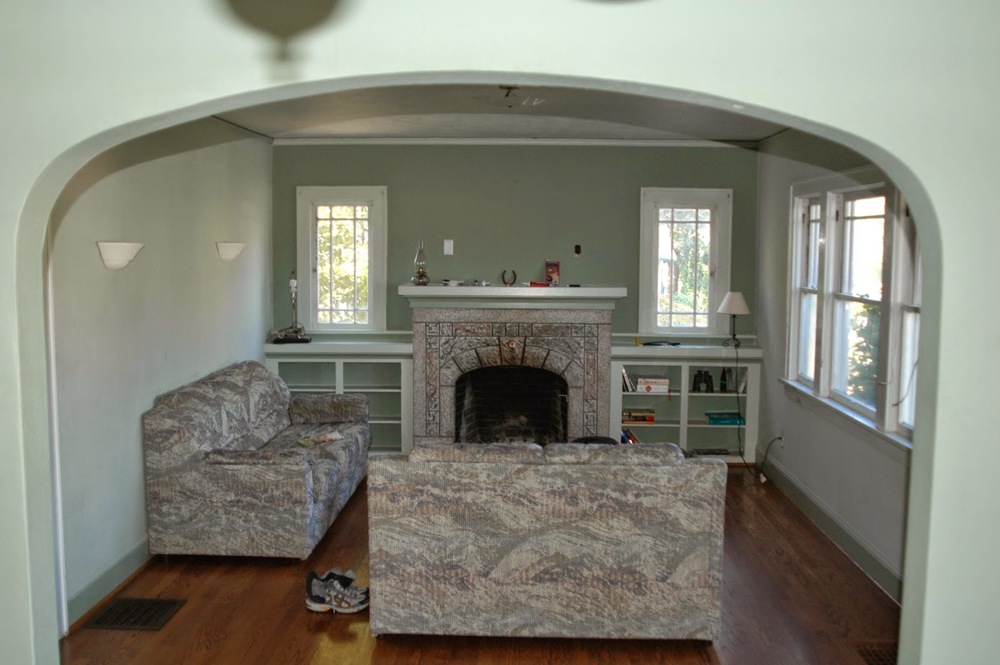
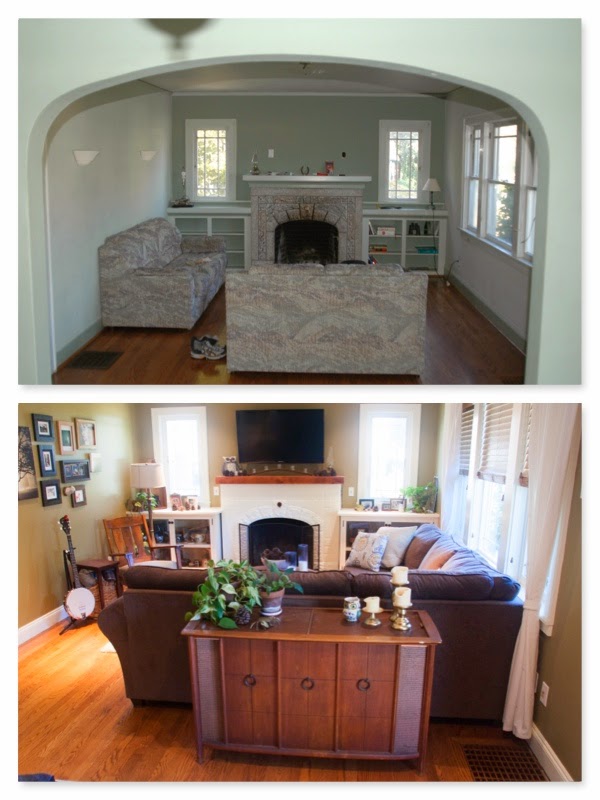
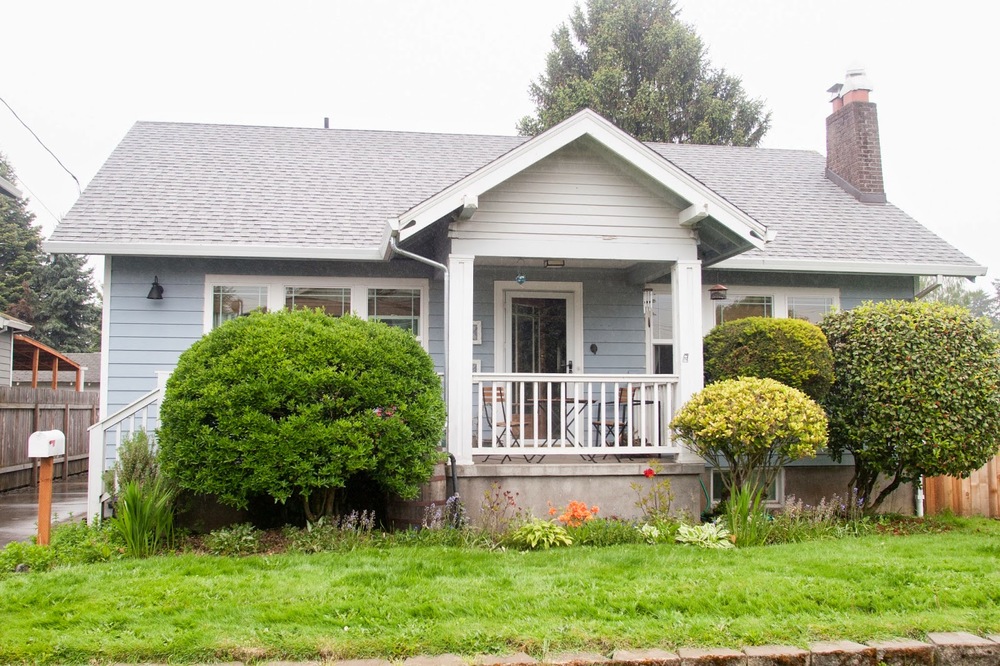
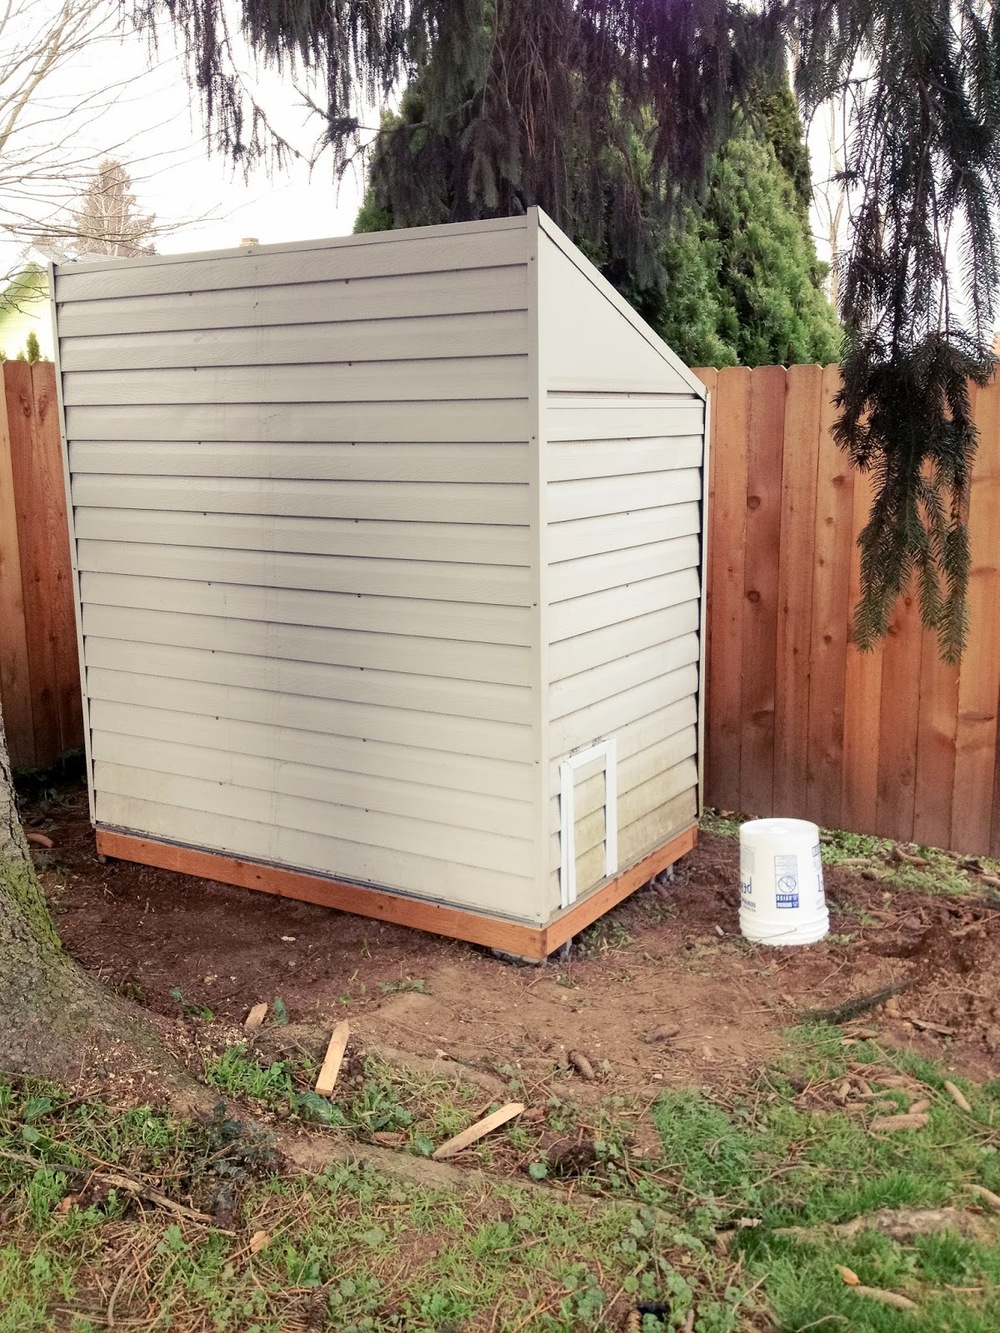
The second image was shot from the same angle a couple months earlier after our offer was accepted. 

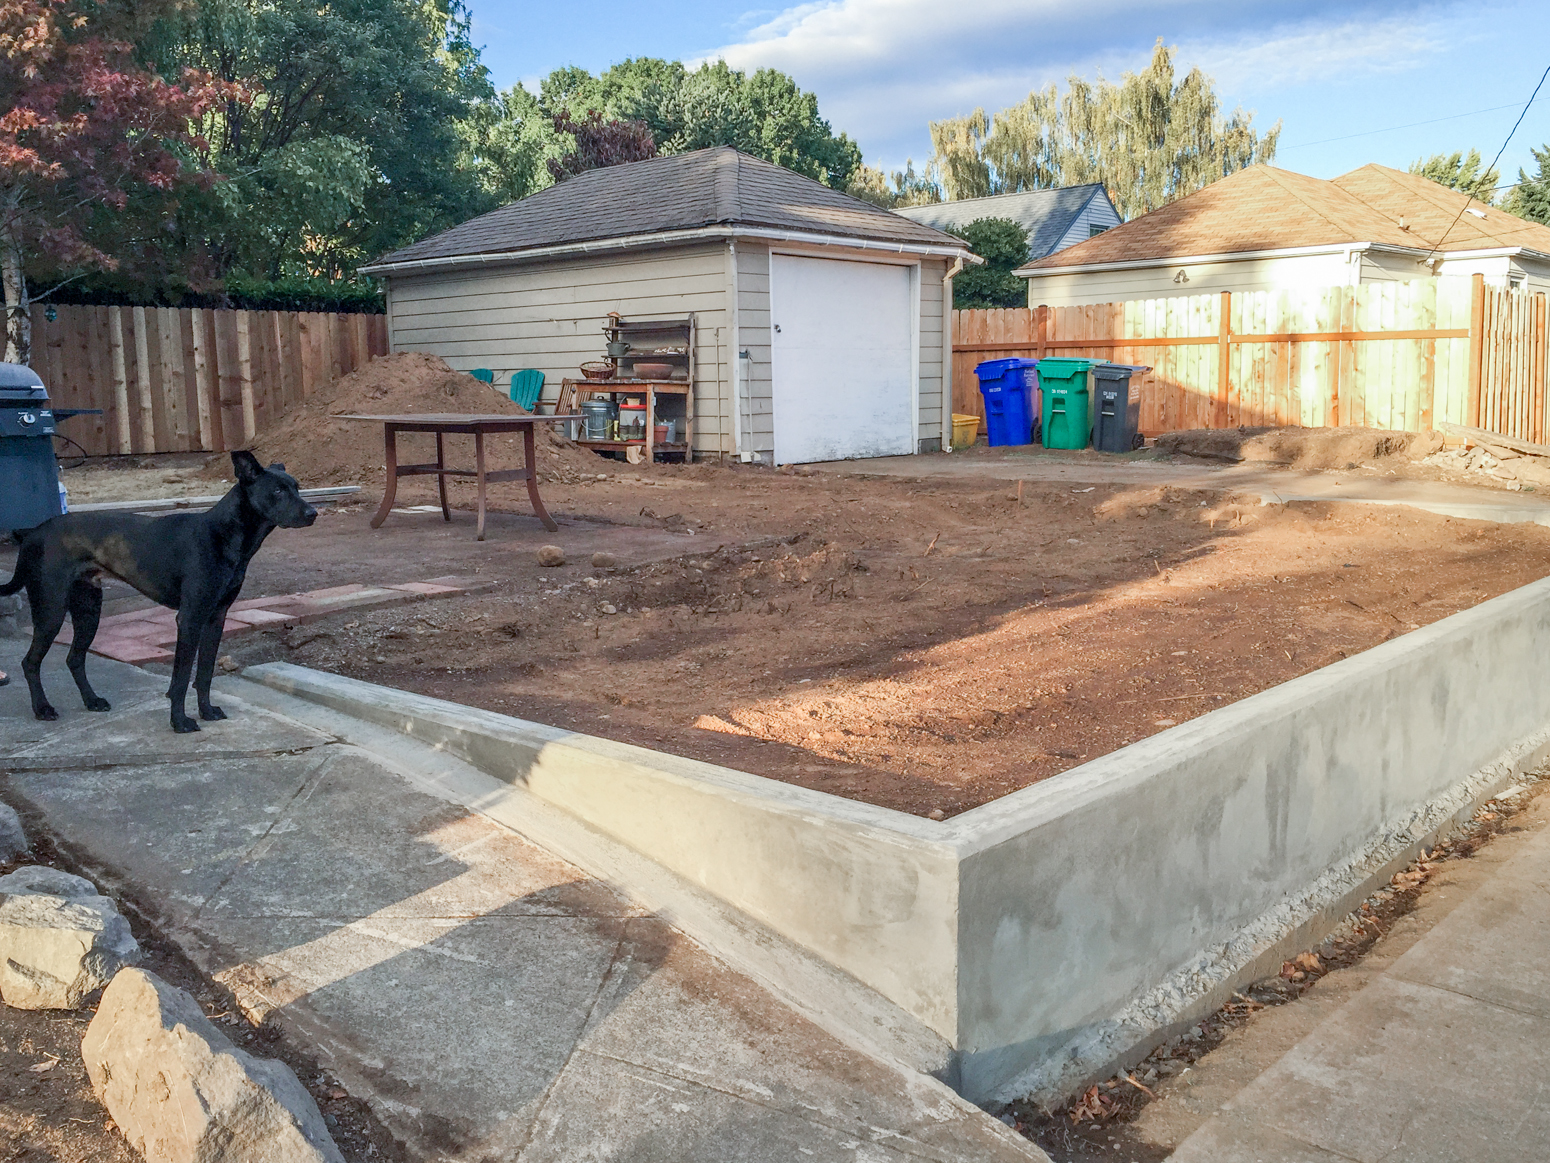
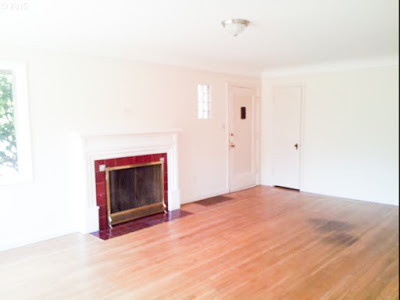
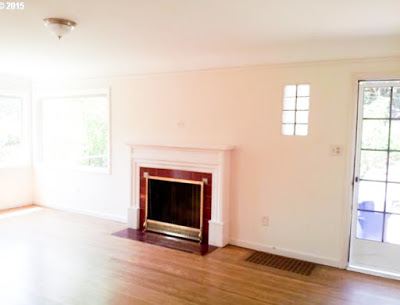
With the wall set and backfilled we had a blank slate that we could start patio planning with.

We went back and forth over the placement of the patio - does it run the width of the house? Or the length of the lawn? Does it need to be directly outside the back door? What if it wasn't? So many questions. So many decisions. So many beers consumed while deciding. Eventually we landed on running it along the the new retaining wall - an arrangement that lent itself best to the future "roof" we will build over it as well as optimizing the most late afternoon/evening sunshine (our back yard is on the east side of the house.)

More questions and more beers later and a footprint for the patio was created - stretching nearly the entire length of the wall minus the last three feet or so to accommodate drainage. (The plan is to have the yard professionally graded down and away from the house which creates a water run off into this channel.)

The narrow portion will be for dining and grilling and the wider portion for lounging around an eventual fire pit. The "bottom half" of the wider portion is the spot that gets the first sunlight in the morning and holds onto the last sunlight of the evening - biggest reason of all to extend the patio in that shape. A rain-well planted with foliage will go in the channel to the left of the patio.

Recall the above-mentioned patio "roof?" Well we took that into consideration when pouring the new patio and had the crew set the post brackets directly into the concrete. We let them talk us out of setting the fence posts directly into the wall - a decision we regretted greatly after as finding simple brackets to drill into concrete isn't as simple as they made it sound. Adam and a friend had to modify what they could find and then drill them into the wall being careful to 1. Not hit the rebar that creates the support for the wall. AND 2. Generally don't destroy our new (expensive) retaining wall. Learn from us - figure out your fence design and set your hardware in concrete as it's poured.

*Also pictured is the conduit for the electrical that will someday be run to the patio for lights, fan, disco balls, etc.

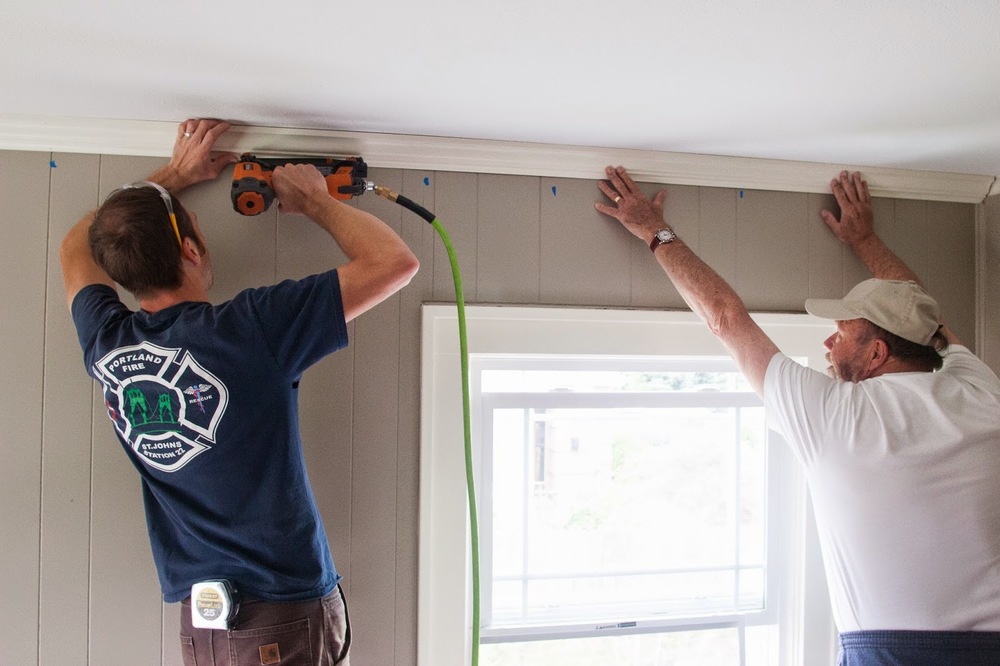
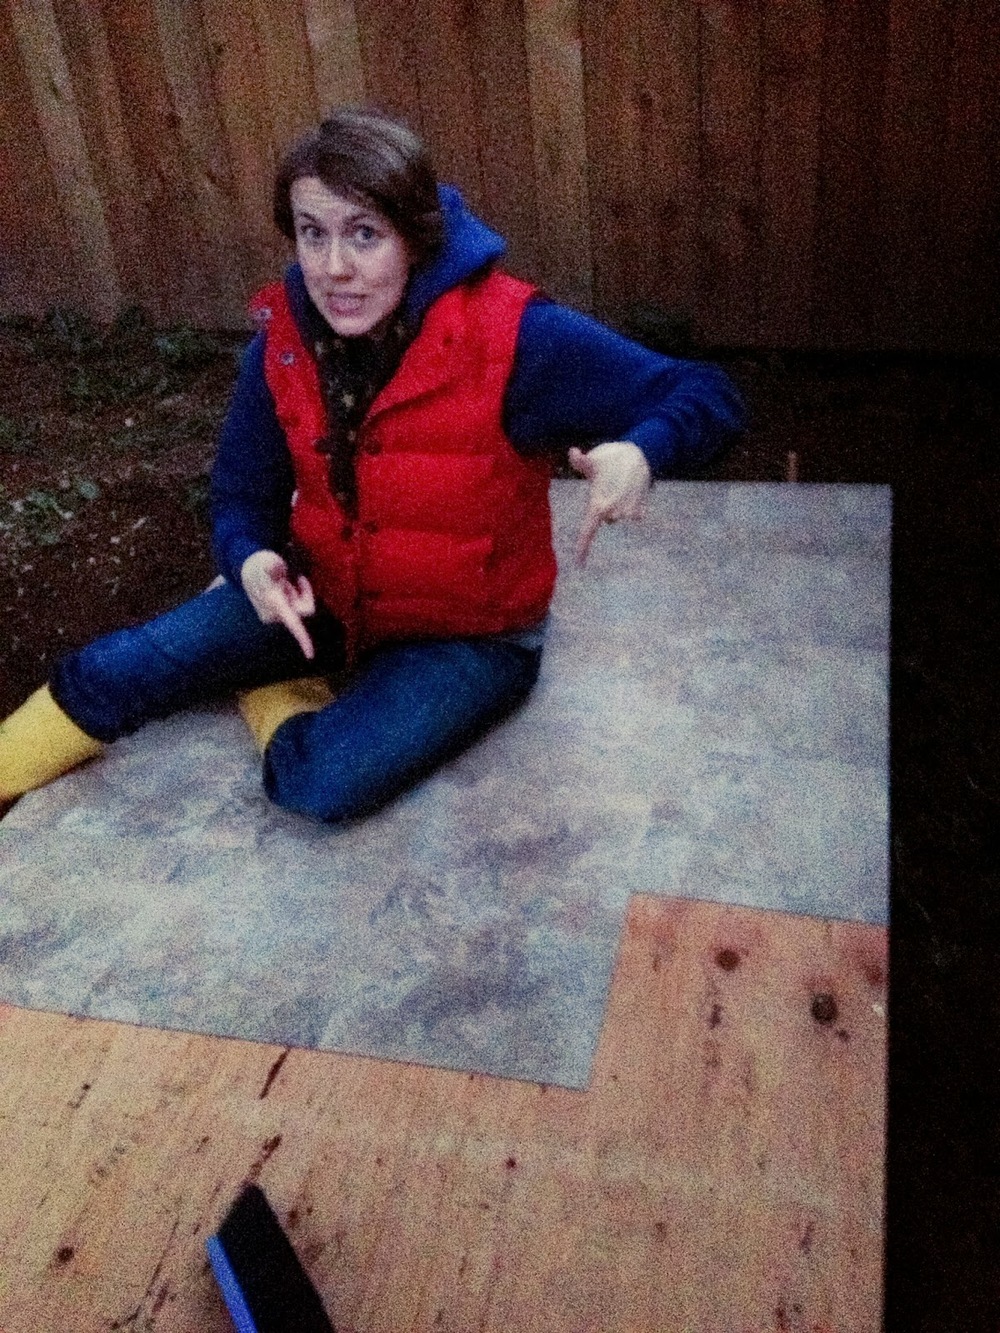
Adam's expression and pose perfectly sums up the patio/bracket hardware situation. It wasn't easy, but it's done. #winning 

Have you ever let a contractor talk you in our out of something you regretted? Were you able to rectify the situation? What advice do you have for homeowners operating as their own general contractors?

See you next time when we start talking sexy cedar fences! Yes, that is a thing.


Becoming our own Yard Crashers

One of our biggest priorities before we moved into our new home was creating a yard space where we could comfortably let the dogs without worry they would 1. Hurt themselves on some unknown danger 2. Disappear into the abyss that was the existing yard.

So bribed with bagels and bloody mary's - a handful of dedicated friends set about helping us demo our back yard in order to find out just what we were dealing with.

View from our driveway back towards the back door.

View from our driveway back towards the back door.

All that ran along the east side of our garage were blackberry bushes. 

All that ran along the east side of our garage were blackberry bushes. 

In order to accommodate the 12' tall by 8' wide laurel hedges that surrounded half the yard as well as a small tree we removed, a half dozen shrubs along the street and countless misc. foliage scattered around the yard, we rented a yard debris dumpster as well as a chipper - turned out to be worth every penny as we filled that baby to the brim.

Using a mix of all the yard tools (chainsaws, loppers etc.) it took a team of about 8 people approximately 5 hours to take out everything we wanted down to the ground. And with only one wasps nest upturned! Fortunately it was discovered by yours truly and not one of our kind friends. 

When we first made plans for what would be removed we thought we'd need to take errrything out - including the cute maple and the beautiful birch. But as we started removing all the excess crap from around those two trees we realized that they were further from the house and further from each other than we had initially thought and therefore could be kept! Hoo-ray!

The following day Adam rented a front-end loader (the 8 year old boy living inside of him was beside himself) and set about removing the laurel stumps from the ground. Not as easy a feat as we had hoped but with the help of a friend they found a way for Adam to remove the majority of it with the machine and our friend stepped in to cut it loose and pitch it into the dumpster. 

After removing the stumps we raked through the dirt to remove the remaining yard debris before our concrete guys came in to pour our retaining wall. The plan being the wall would run the length of the yard along the sidewalk here the laurel hedges once stood and up our driveway until it became level with the rest of the yard. Then - A PATIO! But until then we lived on what was unearthed as the previous tenant's paver patio and this was the view from the kitchen window. 

Stay tuned for phase two of our backyard reno where we talk concrete walls and patio plans plus how to put up a fence that says "we like to drink beers in the privacy of our back yard, but hey! We're still friendly!"

We've Moved!

Happy New Year! 2015 saw lots of change for us - we sold our first house *tear* and bought a new little gem in our dream neighborhood *hoo-ray!* 

I hope to show you some of the final projects from our first home that we completed before selling but for now - New Year, New House! And here she is.


After a relatively short house hunt (five months) we came upon this cutie the week before the Fourth of July. Maybe it was the holiday week but we were shocked when we learned we were one of only two offers submitted - the other being a developer. We wrote our sweet letter, crossed our fingers, and were over the moon when our realtor stopped by to tell us in person we got the house. 

Look at how happy those kids are!


A decent inspection and a smooth closing later and we were holding the keys to our new little home. Want a tour?

Here's our large open living room when you open the front door and note those are coved ceilings!


Cute little fireplace and entry closet as you look back at the front door. (Pardon the quality of some of these shots - some are screen grabs from the listing.)


A corner of southwest facing windows - so. much. light.


Hook a left into the dining room.


Which continues into the kitchen.


This is most certainly not the kitchen we've grown accustomed to but we've got plans...


To the right of the sink is the door to the backyard and the stairs to the basement.


Small bedroom at the end of the hall which will be my office. 


Larger master bedroom with a great closet.


I lurve these little art deco details in the hardware and am looking forward to cleaning them up.


The back yard was a mess - to say the least. We suspected there was a decent yard back there but wouldn't know until we tore all this out.

This is the "view" from the backdoor onto a tired old paver patio. Straight through the hedge we would discover a small fence - our driveway lies on the other side. 


Take a right as you leave the back door and there's a path to the sidewalk. 


From the backyard looking back towards the kitchen window.


These laurel hedges were out of control! 


Why yes we do have a garage back there. At least half of one.


And my favorite - a twenty-year-old neighborhood cat box. 


There is a lot of work to be done on this place but the potential is there and you know how we love projects. Next up - watch us tear the yard out!

What significant things happened to you in 2015? Any projects you were able to wrap up? How about New Year's resolutions to tackle something you've been looking forward to?


Making it Legal - The Final Installment

It's finally done! Well, fortunately this project was wrapped a couple weeks ago but with the Holiday Season upon us I've been less than punctual with our posts.


After ripping out the existing walls Adam went to work sanding down the newly exposed floors as they stood a little higher than the rest of the floor since they'd never been refinished. (This photo was taken after we started the framing but he did the sanding beforehand.)


We also quickly threw some insulation into the ceiling and walls in the closet since there was none before.


We started the framing with the wall that would house the bedroom door before branching off of that to create the new closet wall.


Below is the framing for the pocket door for the closet. (The rectangle in the back wall was where the heat vent used to be, but seeing as it was going to end up inside the new closet we insulated it, sheet rocked over it, and moved the vent into the bedroom.)


We were fortunate enough to be able to use the original closet door as our pocket door - Adam just had to take a few inches off the bottom and fill in the existing hardware holes before I gave it a fresh coat of paint.


The front of the HVAC tube will be drywalled over and then we'll build a top for it that can be removed in case in needs to be accessed. 


Another decision we made while framing was to get rid of the knee-wall access door on the west side of the bedroom (there's still one further south on that wall in my office) because it would have bumped right up to the new closet wall and I wanted a clean corner for a dresser or a reading chair.


The edges of the doorway were then trimmed in 2x4s so there was something to nail the sheetrock too and then insulated, under strict supervision... (You can also see where we moved the vent to.)


Last step before drywalling was to modify the electric slightly. Originally all the ceiling lights were operated on one switch at the top of the stairs, so Adam split that so the three lights in the bedroom are now operated by a new switch installed next to the door.


We also installed two closet lights with a switch just on the outside of the closet door.


Framing and insulation complete we contracted out the sheet rocking. With the many slanted cuts and needing to match the texture to the existing walls we figured it would be worth our time and money to have it done professionally. Three days later and we were ready to prime and paint.


We were able to salvage most of the existing trim from the baseboards and from around the exterior of the closet door, I just needed to give each piece a quick sand and new paint.

Fast forward through installing the trim and hanging the new door and voila! Here's the cute reading corner at the top of the stairs that was created by legalizing the bedroom. Pay no attention to the very comfy but very ugly chair I have yet to recover.


The view from inside the bedroom back through the door.


 It all looks so clean and like it was always there. I think my favorite part is the pocket door with the charming little brass details Adam found for it.


 Remember that beautiful wood we salvaged from inside the closet when we demoed? Handy husband turned it into the top for the HVAC at the back of the closet, thus creating a great little bench.


We had trouble finding simple light fixtures for the closet that had a low enough profile that they didn't eat up the minimal headspace in there - but I found these gems at Lowes. I think they're meant to be used as exterior lights but they work well and look nice and simple.


Here's the corner where the old knee-wall access door used to live. In hindsight we probably could have just moved the access into the closet so that someday we could get rid of the door in my office (which is practically the first thing you see when you get to the top of the stairs) but again, being as this isn't our forever home we're not too worried about it.


Speaking of brass details, can we take a moment to soak in these door knob backplates that Adam found at a local shop in town? Such great detail. And the knobs are reused from another old door in our house that we decommissioned. I love it.


It's not a HUGE change, but it's significant - it increases the functionality of the space and the sellability of our house when the time comes.


 What are you trying to take care of before the holidays? Finishing remodeling that guest room? Building your new dining room table? Maybe just buying and setting up the tree is enough for you? Whatever the case may be I hope it goes swimmingly!


Making it Legal

As it stands now our upstairs bedroom isn't legal - there's a closet and a window but no door between the "room" and the staircase. Adam and I have been brainstorming plans for this space for a while now - how to include a door while taking the attic ceiling angles into account and how to maintain a decent sized walk-in closet should the next owners want this space as a master. If this were our forever home we'd also be planning on how to incorporate a bath as well, potentially adding a dormer to the roof for added space, but since this isn't we're sticking to the basics.

The closet that is up there now is a decent size, albeit full of dated wall paper and a version of sheetrock from the early 20th century... The biggest problem with this closet though is that the wall comes out halfway into the whole room - taking up sizable space of the only portion of the ceiling that is parallel to the floor.


(Doggie photo bomb.)


Our plan is to take out the front wall of the closet in order to knock it back to the bend in the ceiling, which will allow for a full-sized door to then be placed perpendicular from there with a wall that continues across to the other side of the attic. Here's the floor plan for the existing layout.

 Doing this will take away square footage of the closet so we've decided to also remove the back side wall of the closet and stretch it further into the bedroom - the closet will be narrower now but it will be longer also.

Here's the catch - the small square in the corner of the existing closet is the HVAC duct that goes from the basement to the roof, and attached to that is the duct that runs along the floor into the eaves. These are things that have to stay in place, so in order to work around that we have to get a little creative.


The HVAC chase is currently drywalled on two sides so we're going to continue that around a third side before turning from that to create the actual closet wall.


It will create a small little alcove before you enter the bedroom door but we've done the measurements and it doesn't appear that it will impede anything like moving large pieces of furniture in and out. A pocket door will also be incorporated as there won't be any room for a closet door to then swing out into the room from where it is. We chose to keep the closet door on this wall for two reasons:
 - I wanted to leave the wall space opposite of the bedroom window as open as possible for a dresser or art work or both.
 - We wanted to leave the option of installing a shelving system on that short wall to the right of the pocket door.

With a plan in hand we started the demo - first step was removing the closet door and the trim as well as the rod and shelf that were in there.


Next we started taking down the interior walls of the closet - only to discover some really beautiful, super wide rough sawn lumber lurking behind. In order to remove the boards carefully in case we wanted to use them for something else down the road, Adam cut into the drywall on the other side and we popped them free that way.


After removing everything from the interior we worked to disassemble the rest of the drywall and the existing framing so we had a blank canvas. This photo was taken right before we took off the front wall of the closet but it still gives you an idea of the space we have to work with now.


Up next will be sanding down the pine floor where the walls used to be in order to prep them for matching to the existing finish when we're done. We'll also be framing the new closet out and doing the electrical so hopefully we have an update for you early next week.

What are your plans for the weekend? Going to try and get out and soak up some the last of the sunshine or are you eager to dive into a new project? Have you started gathering your decorative gourds yet? I still need to get myself some white pumpkins...


Throw Back Thursday - Living & Dining Room Style!

I had so much fun digging through old photos of our living room's evolution looking for an early fireplace photo that I thought I'd come back this week and take you all on a magical journey through time.

Let's start here with the living room when Adam first moved in.


And the dining room.


After a couple months Adam coerced a couple of friends to come over and help him remove 3-4 layers of wall paper that had been painted over, and over.


Only to discover that much of the plaster was cracked and would need repairing.


So Adam did what any first-time home owner would do - he gutted the living room.

First came the plaster.


Then the lath.


Then he made the decision to rip out the arch between the living and dining room in favor of installing built-ins in its place. This is what it looked like when I met him and saw the house for the first time before the new windows were installed.


Here's me, not much later, over my shock and pitching in.


Adam updated the electrical - adding high-end can lights to the living room (which I was highly skeptical of but am so grateful for), some accent lighting, and AV wiring before hiring out the task of sheet-rocking. 


Xia was not a huge help.


Adam installed the new trim with the help of another friend who also constructed the builtins both either side of the fire place and then between the living and dining rooms.


There will always be room for ongoing improvements (update the fireplace again? Check.)


But for the time being it feels mostly finished. Though there are some sections of trim in the dining room that need to be painted or touched up and the trim on the stairs needs to be finished.


Initially I thought we might miss the arch between these two rooms but I'm glad Adam went the route he did because of how open it makes those front rooms feel - not to mention the giant bonus of all the storage added.


So that's where we're at. What started as a simple "remove wallpaper" project turned into an all-out renovation, which was great for installing things like insulation, new lighting, and wiring the TV flush with the wall, but I think it was more work than Adam had initially thought he'd put into these rooms. It'll be interesting to see how we tackle our next home and what projects we choose to do first and how extensive of a remodel we'll take on.

In the mean time we'll be here, reveling in these before and afters...


What's the largest project you've taken on in your home? Was it your first project or did you live in your home for a time before taking the plunge? What would you have done differently or the same?


Grate Expectations

Ever since we bit the bullet and tackled the hallway this spring - taking down the last of the wallpaper and painting walls and trim - this ugly grate has been, well, grating on my nerves.


Not only is it splattered with paint but it's another episode of "faux-wood" theater. Ugh.


I removed it, vacuumed it, and scrubbed it down before applying two coats of grey spray primer.


I had initially thought I'd like to paint it oiled bronze since that's what the fixtures in the bathroom directly across from it are, but looking around the house I see the other vents are painted black (although they're all in dire need of being repainted as well) so I went with two coats of flat enamel finish in black.


Such a small change feels like such a difference, especially because this is something we can see coming from four different rooms in the house.


Below is the kitchen vent which is in about as good of shape as our bedroom vent. One thing checked off my list and another two added...


What do you think of the small transformation? Are you ticking anything off of your house to-do list this week? Any quick spray paint jobs?


Too Hot to Handle

It's hot. Like H-O-T hot. Which means the last few days have found me inside, reveling in the air-conditioning, pouring over my favorite design blogs and thinking to myself, "you're overdue for a blog post." And what stares back at me as I sit on our couch but our gaping dark hole of a fireplace. The red fireplace I've been threatening to paint for the last six months. It's the focal point of our living room and it's where light goes to die.


Don't get me wrong, it's leaps and bounds better than it was when Adam bought the house and the previous owner's passion for all things pink and mint green was still going strong...

If this were our forever home I think we'd sit down and brainstorm a plan to eventually reface this guy as there are no fewer than three different textures of manufactured stone going on here - from the Rockies to the plains to the beach after a rain storm - but we wanted to do this quickly and on a budget. In trying to keep with the traditional craftsman vibe we chose to paint the stone facade a deep brick red and at first we loved it because it was such an improvement. But eventually I began to feel like it was sucking all the light from the room, and being as our living room is in the northeast corner of our house with hedges outside the largest windows, we could use all the light love we can get. Then when we added the new reclaimed-wood mantle that Adam built it became a little too "cabin cozy" for me. The pine cones and the owl don't help, I know.


The built-ins flanking the fireplace are painted the same color as the trim throughout the better part of our house and I had most of a gallon left over from when we did the trim in our bedroom.

It took me two coats to complete and because of the "terrain" of some of the stones I had to apply my paint pretty thick to get into all the crevices, which led to some drips. I've learned that often times it's best to let a drip dry completely and pop it off with a straight blade later rather than to try and wipe it away, especially in hard-to-reach areas like under these bricks.


I'm in love! Friends, this thing literally bounces light back at you! I'm so happy with the result and I hope Adam is too (I pulled this off while he's been at work - danger.)


There's just something about the way the mantle pops off the white stone - it makes a bolder, cleaner statement. Now to scrub the hearth and update the decor up top.


We still have some trim work to iron out around the sides but for the time being the paint job cleans that area up substantially.
And in honor of #throwbackthursday...


What do you have in the way of throw back Thursday? Any awesome shots from your home before you started working on it? Or midway through a big project?


Bedroom Revamp - Part II

It's finished! We now often catch ourselves standing in the doorway oohing and aahing at how light and bright it is. Taking that brown crown molding down and replacing it with the new shiny white molding makes me feel like we've added a foot to our ceiling height. Exciting stuff.


We last left off with having removed all of the nasty faux-wood trim which we thought was going to leave behind unsightly gaps between the paneling and the window and door frames - fortunately for us it wasn't anything a little selectively applied caulk couldn't handle.


I painted the new trim in the garage (at this point we've painted enough trim to learn that if we can paint it all in one stretch without having to cut in along ceilings or floors it goes a lot quicker) while Adam caulked around each window and door as well as along the corner trim pieces that we chose to leave intact. We also took the time to put two coats of white ceiling paint up as well - we had no idea how grungy it was until the new paint went up...

There was one area under one window that the gap was more substantial - I could see it from the hallway - so Adam ripped down a length of quarter-round and nailed it underneath before I painted two fresh coats on all the trim - we went with the same color we've used throughout our living and dining rooms as well as our hallway. Next came wall paint - we settled on "Play It Cool" as our color of choice - for obvious reasons. After painting nearly every square foot of this house together it has been established that I cut in and Adam rolls, we're a match made in heaven.


Ceiling? Check. Window and door trim? Check. Walls? Check. Time to install the new baseboards and crown molding - and look who arrived just in time to help! Mama and Papa K drove out to spend the week with us and we quickly put my dad to work.


Adam dry fitted the baseboards which involved ripping lengths of material as thick as the paneling to run along the floor behind the trim so it would adhere flush with the wall. Then they cut the corner bead back to accommodate the new, taller trim. Speaking of that taller trim - here it is doing an awesome job of concealing the weird panel seam from before.


Then came the molding - they marked where the studs were, measured thrice, cut once, and installed it.


Adam did an awesome job getting creative with this wonky corner.


Following them around the room I set any nail that didn't go below the surface with a hammer and nail-set tool, then I filled each hole before touching up the paint. And voi-la! We're both pretty stinking happy with the result.


I'm working on updating the art in here and am contemplating using some images from this great reference book I found at a local antique shop. The thought is to chose three of our favorites, frame them in matching frames, and hang them along the wall above the dresser.


The wall opposite our bed is a giant blank canvas as well and I think this handsome fella would look GREAT over there. Oh, and we went garage saling this last weekend and I scored some new lamps - here's one auditioning for a starring role on my nightstand. You like?


What have you spent your last couple weeks working on? Have you been out for your first garage sale of the season? Any great deals? 


Bedroom Revamp - Part I

With summer narrowly approaching - full of warm days and cool nights - all a girl wants is to be able to open and close her bedroom window as she pleases. Instead I wrestle, bracing myself against 90 year-old windows in the hopes that this time I'll be able to open it enough to allow some air in but not so much as to attract the attention of bugs. These are fortunately the last two windows in our house that need upgrading.


The time has come friends, the time has come, and with this little update I again coerced Adam into making a small project bigger by replacing our faux-wood trim and molding and painting the room. Again.


There are some real hi-lights to this trim and paneling - fortunately our new baseboards will be tall enough to cover this minor miscalculation. 


How many pieces of plastic trim do you need to cover a span of less than 8 inches? Apparently a minimum of 2. 


Each window was wrapped in plastic "wood" quarter round - we assumed to hide giant gaps between the paneling and the trim.


First things first - after measuring, ordering, and picking up our new windows we set about removing the old ones. Adam removed the interior stops from each frame as well as each sash pulley.  Both windows came out with little fuss which was a welcomed surprise. 


Then we dry-fitted each to make sure everything fit correctly and snugly. Next Adam applied caulk to the inside of the exterior stop, we popped them in, and he proceeded to caulk the exterior from the outside as well as the final interior seam. 


You guys, these windows practically open themselves! I'm over the moon. Now for the trim.


Fortunately non of it was glued so with a small pry-bar, a molding bar and a hammer we were able to remove it and all the nails fairly quickly. 

"Why don't you take the wood-paneling off too while you're at it?" you might be asking right now. Well let me direct your attention to the following:


Behind that paneling lies at least 2, potentially 3, layers of wall paper which are covering original (pepto bismol pink) lath and plaster walls that would need a lot of attention. If this were our "forever" home we would tackle this project, but being as we don't see ourselves being here for more than another couple of years, we're going to keep it simple and paint over the paneling. 

Just for fun, let's go back in time to when I first met Adam and this bedroom looked a little something like this.


At the time his goal was to eventually re-surface the walls in this room with new dry-wall, but until then he was rocking the paneling, complete with a futon and a TV/VHS player combo. (This was due to the fact his living room was stripped down to the studs - more on that at a later date.) 

As someone who had only rented in her adult years, my first question to him was - why not slap a coat of paint on these hideous walls until you're ready to re-do it? Well he was of the mind-set that if he was going to do something, he was only going to do it once. And then along came me.

So now here we are, gearing up to paint this little room once again. And here are the contenders... 


What do you think of our color options? Have a favorite? Any projects you're prepping to tackle this weekend? We hope to be back here next week with the rest of the revamp!


Couch Potato

It must be the weather - long, sunny days start to shine light on the little corners of the house that need a small facelift, a little freshening-up. We have a really great, locally made sofa that Adam bought when we first started dating, and I love it, I really do. I just wish it was grey instead of brown.

But until that happens I'm taking a stab at integrating some grays in with the brown (gasp!) and getting rid of our super shiny, floral, green and yellow throw pillows.


These delightful little pillows came my way via a good friend who is moving and purging everything - and while I'll be sad to see her go I'm really excited about these pillows.


My hope is to recover all of the offending pillows in a mixture of beiges and grays in order to create the illusion of my new favorite color, "Greige." Look it up, it's a real thing.

This remnant of off-white linen was from another throw pillow project for our bedroom and it was the perfect size to wrap around the smaller sofa pillow.


One thing about the original pillow I knew I might miss was the little bit of visual interest in the embroidery so I played with ideas on how to bring something similar into the new cover. I settled on a simple set of chevron stripes that I lightly sketched with pencil on the back of my fabric before I assembled the slip cover.


Then I ran it through my sewing machine, going over each line three times with a medium grey thread and then finished assembling the cover.


Looks pretty nice, it's a little simple but I think it will live nicely with the new grey and yellow ikat pillows.

And here he is - living with his new neighbors. The pillow to the left was snagged from our bedroom and you can see my first attempt at the "poor woman's embroidery" technique.


What are your thoughts on mixing gray and brown? Appalling? Or is it an antiquated rule like no white shoes before Memorial Day? Speaking of, Happy Memorial Day weekend to everyone! Let the white shoes reign! 

Be My Guest

The folks are coming to visit next month so naturally we're compiling a list of things we feel like we should get finished before they arrive. Nothing like hosting to motivate you to get things done.

We have a little guest "suite" downstairs that gets a fair amount of natural light and has a small sitting area as well as a full bathroom. It's a cute little corner but it still needs some personality.


Deep in a closet there is a box of things that moved with me from my old house that still haven't found a place to live on these walls. This was my first stop and I came up with enough items to adorn this space.


I laid everything out on the floor in a configuration I liked and then because my fall-back style of guessing, hammering, and realizing the position was wrong would have made for a far less interesting story, I busted out my newspaper, scissors, and tape.


After I had cut out shapes for each of my pieces and placed them on the wall the first time I decided the grouping was a little high and a little too far to the left than I wanted.


My next placement was better, pulling everything down a little closer to the chair and over to the right as well as spacing some of them apart a little more. 


Comfortable with this arrangement I went ahead and began hanging, starting with the center top piece (the portrait of our adorable pooch, Xia) and working my way out.


This was the placement that I had been trying for but the black print in the dark frame dragged the whole arrangement down, so I tried an old mirror that was hanging on an opposite wall.


This had the desired effect of brightening up that corner but it felt a little too bright since every other piece had at least a little black in it. Plus I liked the mirror on the wall going into the bathroom better than in a corner.

So I sacrificed a white frame I had and tried for the black horse print again.


Better - the look of the black image in a white frame is a fun contrast to the lighter images in the black frames - but I'm not sure I'm sold. It's great for now because it's 1. Done and 2. Didn't cost me anything. Now to remember to put a battery in that clock. 


Do you have a corner in your home that needs a little love? What are your plans for it? Are you trying to do it on a budget or is it something you've been saving for?


Baby I Got Your (House) Number

This is the story of a project that should have taken me an afternoon but instead took me the better part of the week.

Our house numbers have always been a little crooked and a little discolored - so last week I decided I was just going to take them down, clean them off, paint them and re-hang them. Ha.


Upon removal I see these bad boys are covered in at least three coats of poorly applied paint.


Not to mention the mess they left behind on the columns. 


First step, while I still had the ladder out, was to take some warm soapy water and see how much of the grime would wash off. Results weren't terrible but I'll be back through with a little touch up paint shortly.

Then we head over to our favorite non-toxic paint remover and get working on the numbers. 


Thirty minutes of soaking later and it now appears the numbers have no fewer than half a dozen layers of paint - black, white, at least two blues, a pale yellow, and a kelly green that has me very curious...


It also appears that the non-toxic stripper is no match for this project - time for more extreme measures. Full disclosure, two more rounds with the toxic paint remover and I was about ready to call it quits, go to the hardware store, and buy new numbers. The majority of my day had already been burned by this one task - but then I discovered on the back of one of the numbers that they were made in Germany. OK, so that's pretty cool. (You can just barely make out the markings at the top of the 4.)


I persevered and an embarrassing number of hours later they were clean and down to their shiny aluminum selves. 

Then to the decision of where to hang them - I had already decided I didn't want to put them back on the column and had considered to the right of the door. 


Then Adam comes home and says "what about under the light on the left above the stairs?" All right smarty pants, I like it. And then just for fun, "why don't we mount them on something." OK - I can get on board with that as well. We decided on a white placard for the numbers, and I know this seems wrong after all the time I spent stripping them, but we decided to paint them oiled bronze to go with the light fixture and to pop a little better off of the white. 


At this point I'm on day two of what should have been a one day job, and it's pouring down rain and I'm certain there will be a day three and even a day four to this since I can't get much painting done in the rain.. 


Also, don't remove your house numbers if you're expecting a package. Or pizza. If you do, be prepared to improvise. 


Next day it clears a bit and I work to spray two coats of primer and then two coats of oiled bronze onto the numbers in between showers.


Adam cut me a piece of poplar to serve as the background which I sanded, giving the edges a slight bevel, and covered with two coats of spray primer (front and back) as well as two coats of exterior paint, brushed on. 


Then I placed my numbers along the completed piece where I wanted them, found two spots where the numbers were wide enough that they would cover the screws needed to attach the board to the house. I traced a small penciled area, pre-drilled pilot holes, and drilled a wider opening for the very top to allow for a counter-sunk screw. 


Then I mounted the piece to the house, centered beneath the light fixture, and adhered the numbers with small nails. As you can see, the nails were galvanized and didn't match the finish of the numbers.


To fix that I sprayed a bit of the oiled bronze spray paint into a clean container and used a cotton swab to dab onto the nail heads. 


Problem solved. I also took a little of the exterior paint and touched up some spots that the numbers had scratched. 


It took much longer than I had anticipated, and I can't say I would bother with the numbers if I had it to do over again, but now that it's done I'm glad I did it. 


The house numbers on the white background adds something to that part of the house that I didn't really recognize was missing. I'm looking forward to seeing it tonight lit up.


Have you encountered a project that took much longer than you had planned? What kind of modifications, if any, did you have to make? Would you do it again if you had to?

Laundry List

Something we didn't account for when we remodeled our kitchen was the collateral damage to our laundry room. The laundry room sits directly below the kitchen and since we were planning on moving plumbing and adding a gas line we had to tear out nearly all of the drywall that the previous owners had installed.


Silver lining? It forced us to finally paint the laundry room... that is after Adam re-drywalled it of course. And it allowed him a chance to install the slop sink that he'd been pining for. Everyone wins. 


No sooner had we painted it blue and re-installed the washer and dryer, than I was already sick of the color.


Fast-forward two years and I finally wore Adam down convinced Adam we should paint it a new color and install some much-needed cabinets. See that unsightly grey rubbermaid shelf with all the stuff on it? It lived in there permanently - hence the "much-needed" part.


For the phase one update Adam had to build a sort of "stage" for the washer and dryer as no part of the floor in our basement appears to be level. 

New color having been chosen, we took to prepping the room and the platform to be painted. 


Two coats of paint on the walls and three coats of white decking paint on the platform and we were ready to shop for cabinets. And by shop I mean go to the rebuilding center and riffle through decades old cabinets and try to pull a couple together that look like they might be related...

We knew we wanted a small upper to go above the machines to house detergent and other cleaning supplies plus a base to go next to the sink where we could store tools and be able to fold laundry.


A few laps around the store and we found our uppers and a small slender base that Adam calculated could live between the washer and dryer. We also found our base but it was part of a set and they're usually reluctant to split those up but I went back the next day, pled my case and they sold me the single unit. Hoo-rah!

Painting cabinets - a necessary evil as they were all different colors and stains. The base being a lovely royal blue, yes the base from the full set. An entire kitchen worth of Royal. Blue. Cabinets. 


We removed all the doors and drawers and all the hardware, sanding everything to rough it up and painted (2) coats of primer and (2) coats of white paint to everything. I chose to paint the interior of the cabinet doors and the interior of the upper cabinet but chose to leave the base interior original. (I apologize for the lack of "during" photos - hoping I make it up to you be overdoing it on the "afters.")

Adam mounted the upper above the washer and dryer and completed the look with open shelves on either side. Then the mini base got squeezed in and mounted to the platform. 


While the room was decommissioned for the upgrade I took the opportunity to spray paint our breaker panel door white - a refreshing change from gunmetal grey. 


We found inexpensive pre-fab laminate countertops at Ikea and were able to use one piece to top both bases off. It's not my most favorite design and I wouldn't put it in a higher-profile room but for a budget laundry re-do it's great. 


Found these great cloth baskets at Marshall's and they hold things like hand towels, laundry bags and such. 


As luck would have it, the small base was the perfect size to house the same pull-out garbage system we have in our kitchen. We chose the two square containers as opposed to one rectangular as we don't accumulate much garbage down there and the second one serves as a laundry hamper for things like dirty dog towels and household rags. 


Lastly I hunted down two of the cutest rugs I could find. I'm head-over-heels for this grey and white geometric rug from Target. They're both wool and probably too nice for a laundry room (I spent as much on these two rugs as all the cabinets combined). But it makes doing laundry that much more enticing. 


Coming down the basement stairs and seeing this view makes me much, much happier than our initial effort. I had originally wanted Adam to install a door on this room to hide it and now there's no need as this is one of my favorite rooms in the house. This thrills Adam.


Have you tackled a whole-room makeover lately? What do you love about it? What would you have done differently?


Fab Friday Find

Do you know what's awesome about the internet? Window shopping in your pajamas - that's what.

While trolling said internet I stumbled across this fantastic little Etsy Shop - Pixie Pixels. Her prints are delightful and she offers dozens of custom colors to go with any room in your home.

How about this gent for a living room?


This octopus or this bike have "kiddos room" written all over them.


I could see this lovely chandelier in an upscale walk-in closet to emulate the real thing. 


And this botanicals collection could live just about anywhere in a home - in a dining room or above the bed perhaps?


What's your favorite Etsy shop? Or maybe you have your own shop - what kind of awesome things do you sell?


Have You Seen My Keys?

If Adam had a nickel for every time he heard me ask that question, he'd be rich. Or at least slightly better off. So we decided to do something about it - create a space in our house (near an entrance) for things like keys, sunglasses and darling notes to one another. We began to brain storm - it had to be functional and be able to keep our accouterments organized without taking up too much space, and of course I'd like for it to look nice. Ta-da! Let's repurpose an old medicine cabinet into a mini command center!


I sent Adam off to our favorite recycled housewares store - not expecting to strike it rich the first time out - but he pleasantly surprised me with this great find.


Solid wood and in good shape and only $20. Sold. My initial thought had been to paint the interior white (it was a pale yellow and very dirty) so I set about sanding the surface to prep it for paint and as I let the sanding go a little too far I discovered the interior wood to have a really nice grain to it. Hmm..


Two rounds of paint stripper and a round of sanding and I was left with a sort of "distressed" look. I had hoped to rid it of all the paint but I sort of liked the result so I put on a clear coat to seal it all and called it good.


To install it into the wall Adam located a stud bay (the space between two studs) and cut a rectangle the size of the cabinet. He mounted it into the opening and attached it with screws to the studs on both sides.

Next was to fashion new shelves (the original ones were glass) and find small boxes narrow enough to fit on the shelves and hold our things. Adam headed to ikea and killed two birds with one stone by picking up a package of these wood magazine holders. The width of the wood was perfect for the thin shelving grooves and what he didn't use for shelving he cut down and cleaned up to be the storage boxes. PS Grand Budapest Hotel was great and I recommend you go see it. 


Then he reinforced one of the shelves with a small strip of wood and installed cup hooks along it to house our keys.


To create a space where we could leave the above mentioned love notes we took a sheet of magnetic sheet metal, cut it to the size of the interior of the door within its frame, and glued it in place.


Lastly I painted the outside of the door with chalkboard paint and now, as you can see, it's always Happy Hour at our house. You might notice the small patch job to the side of the cabinet - we had something hanging there originally and still need to touch up the paint but we're busy enjoying happy hour...


What's the most creative way you've seen someone repurpose something? Do you have a "repurposed" favorite in your house? 

How Does Your Garden Grow?

April showers will bring May flowers, and hopefully July vegetables. This weekend we took a moment to sneak out and take advantage of the spotty sunshine and put some carrot and beet seeds in the ground. We're probably a couple weeks behind the curve but eh, live and learn.


The leafy greens we planted a month back are shaping up - in spite of getting between a dog and his squirrel - and the snap peas are looking good too.


This season Adam transplanted his hops from being directly in the ground to these half wine barrels as the barrels tend to heat up quicker and stay warmer longer. Warmer roots = more hops = happy home brewer.


And here's an overall view of the garden - the bed in the middle will house our tomato starts once they've been hardened off and are ready to be outdoors around the clock. The bed nearest us gets the most shade so that houses our lettuces, kales, spinach, etc. The bed behind that has the snap pea starts which will eventually take over the trellis behind it. And the furthest bed is where the root vegetables will live as well as our butternut squash as there's room along the backside for it to trail.


The weather this week looks like it's shaping up to be a good time to begin hardening off our starts - right now we have two types of tomatoes, one hot pepper, two summer squash and a winter squash. This is the first year we've done starts and so far are pleased with their progress. Check back in August after we've had some time to harvest...


Have you started vegetables from seed? What kinds have you had the most success with?

One Night Stand

Finding the perfect night stand is like finding the right pair of shoes to complete an outfit - and if it's cute and functional - you win.

My requirements were - 1. Storage 2. Decent height so I could easily read my clock from our lofty bed 3. Cute 4. More storage. We have a small bedroom (God bless the 1929 craftsman) so the more nooks and crannies we can create to house our things, the better.

Met this little guy at one of my favorite Portland thrift stores - and while I didn't fall madly in love with him at first sight - it had the height I wanted and a price tag I could get on board with ($20.)


The top piece was just a thin square of cheap plywood so that went away first thing. Then I removed the drawers, lightly roughed up the surface of everything with 120 grit sandpaper, and spray painted 2 coats of a nice glossy ivory. 

The drawers had a groove along the bottom for pulling them open but I wanted to update the look and give a little visual contrast to them so I sourced three pulls - they appear mostly black but they have a slight "oiled bronze" patina to them.


For the top I wanted a "polished rustic" look, so Adam and I dug through our scrap barn wood and unearthed some pieces that he then ripped down to various widths (2" - 3".) I used our random orbital sander to make them smooth and he attached them from inside the top drawer with our nail gun. The finish is just a clear gloss spray I had lying around - I'll keep you posted as to how that holds up.


And here's the finished product nestled into its tiny corner in our bedroom.


What's your favorite thrift store find? Was it perfect to begin with or did you revamp it especially for your space?

Spring Chickens

Well being as it's spring in the Pacific Northwest - I thought I'd share with you all our chicken coop and a bit about how we got there.

We found this little gem posted "free" on Craigslist after having hunted for something like this for weeks. Hitched up the trailer and drove out to see it - couldn't beat the price. But... It was one of those "some assembly" required when it was new - the owner had built the shed in his backyard - inside his 6' fence. The gate wasn't wide enough to accommodate the shed but thanks to the help of two neighbors, myself, Adam, and the owner, we were able to hoist it over the fence to freedom. (The shed is made of light-weight sheet metal and doesn't have a floor.)


Our first step was to build a platform for it to live on as we didn't want it to be subjected to rodent visitors. 


Then we placed inexpensive peel-n-stick tiles over the plywood floor for easy cleaning. I don't know if you know this but chickens can be kind of gross...


I had to work double time as the sun started to go down finishing just as it got dark.


The next day we mounted the coop to the platform and Adam cut the "chicken" door out of the lower right corner. Here's a view from the inside.


Next step was to build the perimeter of the run - keeping a space to allow for a door for us to access it - and completing the run with 2"x4" galvanized steel fencing - being careful to counter sink the fencing an inch or so around to deter unwanted visitors.


We topped the roof with corrugated steel and decided to install a window into the coop for more light. We found the 24"x24" window at a local re-sale store for fairly inexpensive. We also installed two simple HVAC vents to either end of the coop that can open and close depending on the weather for some cross-ventilation.


For the interior we concluded that the ladies didn't need all 4' x 8' of the space so we devised a way to build a closet space into the front 1/4. Here we can keep their food, bedding and other miscellaneous chicken supplies.


The middle shelf you see in the closet extends the length of the coop where we've installed their double nesting box as well as the roost where they will sleep.


Here's Doris trying out the little ramp we included to assist them on and off the shelf if needed. See, I told you chickens can get gross.


And for the final step - making it look nice! We chose two exterior paint colors - one for the "trim" and one for the rest of the "siding." I then cleaned the exterior from top to bottom, allowed it to dry, and painted (2) coats of paint and primer in one. 

Then I twisted Adam's arm into making me shutters and a window box which I painted a contrasting color and filled with geraniums. Last but not least were two hanging baskets filled with flowers and these girls are set.


What are you doing to get ready for spring? Are you as in love with planting colorful flowers around your yard as I am?